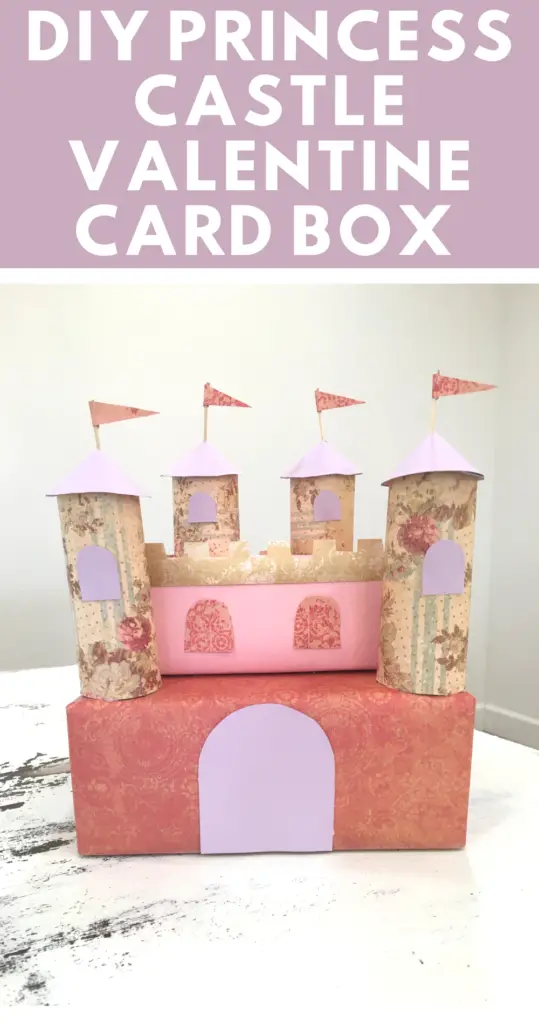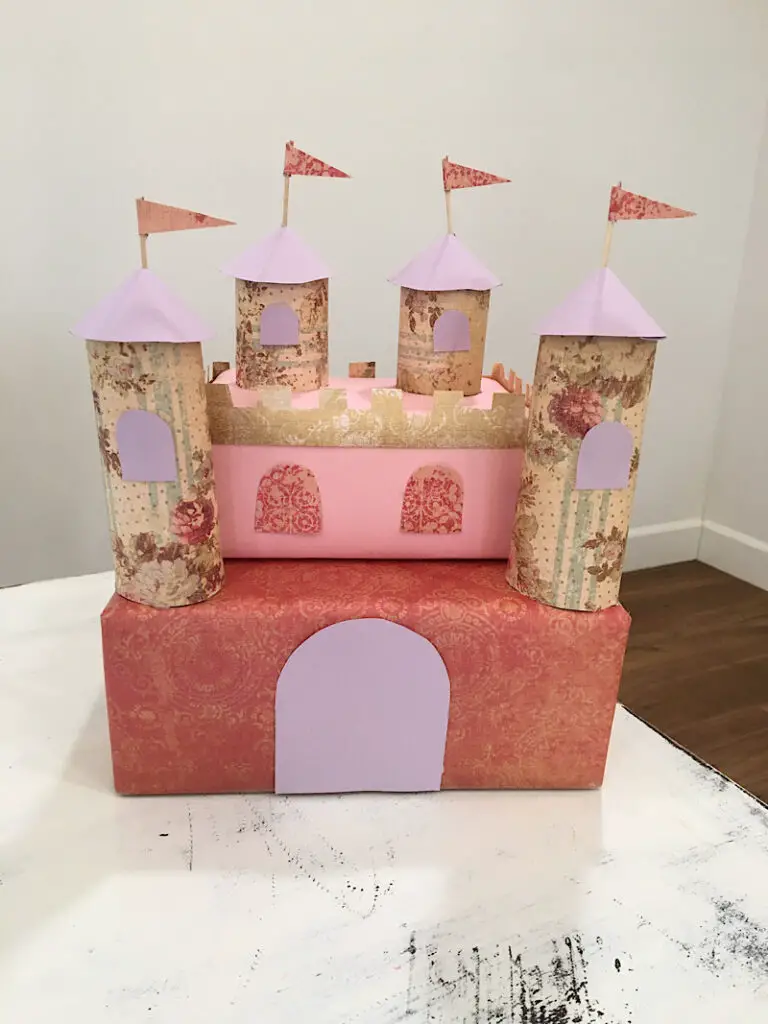
Learn to make an adorable and magical princess castle valentines box with supplies you already have at home! It is easy and quick, and your kids will love taking it to school with them to collect their valentines cards in!
If you are looking for valentines day box ideas, your daughters will love this one! (Although you could totally make a boy themed castle too!
We put this cute box together in less than an hour, with supplies we already had at home. Plus, you can really customize the design to make it your own!
What I love about this cute box is that although it is so detailed, it is really quite simple to make, so don’t be intimidated!
Let me show you how I did it…
This post may contain affiliate links. As an affiliate, I make a commission on qualifying purchases at no extra cost to you. See Disclaimer for more details.
Tutorial Notes
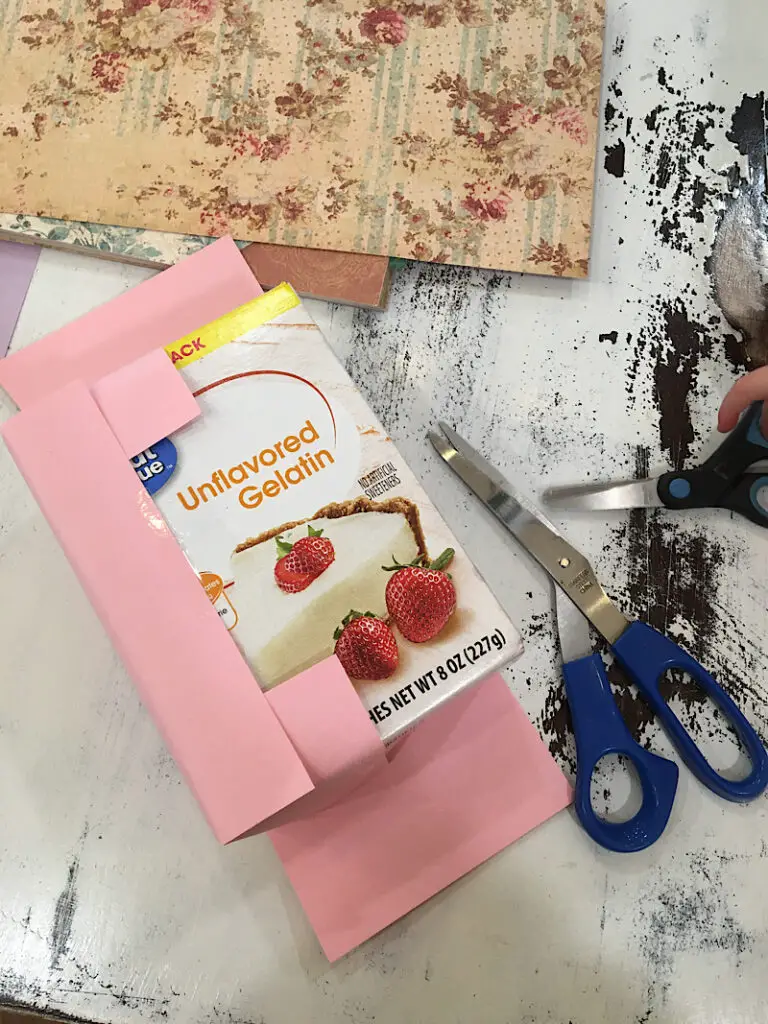
The boxes I used for this craft where a tomato paste box from costco, and a gelatin packet box from walmart. Any medium sized boxes will work, but the dimensions will be slightly different than my castle. Cracker boxes, kid’s shoe boxes, pasta boxes, all are good ideas.

Note about cutting the Card Slot: If you want to cut the card slot of the very top of the top box, you will need to cut a hole in the bottom of the top box, and the top of the bottom box so the cards can fall all the way through. you should think about this beforehand. I did not make mine this way, but I wanted to mention it as an option!
This project is also really great for use as a decor item at a birthday party! It would go great paired with my DIY Unicorn Pinata.
Also check out these awesome Valentines day card ideas:
- FREE Crayon Printable Valentines Day Cards (For a candy free valentine!)
- Free Valentine Cards Printable (Mini Envelopes!)

Supplies Needed
For this craft you will need a handful of common household supplies, but you can also get creative and you what you have at home already!
- Two cardboard boxes, one medium, one smaller (One will be the base of the castle, and one goes on top.)
- Three toilet paper tubes
- Scrapbook cardstock in whatever colors you want your castle to be (I used purple for the windows and tower roofs, and vintage scrapbook cardstock for the castle walls) (You could alternatively use paint to color everything, or even wrapping paper.)
- Scissors
- Hot glue and a hot glue gun
- Tape
- A pen
- 4 Toothpicks (to make the flags with)
How To Make a Castle Valentines Card Box
Step 1. Cover The Boxes
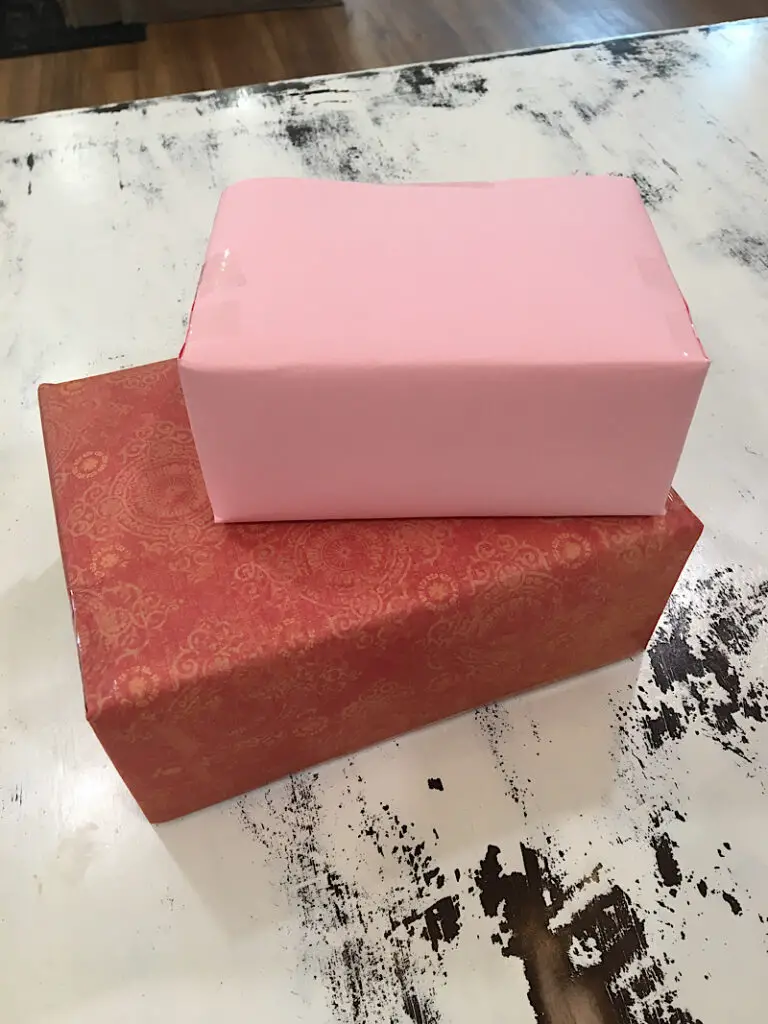
Decide what color you want your castle pieces to be. Wrap the bottom box and top box in paper.
I wrapped mine sort of like how you would wrap a present, but since the paper is so thick I cut notches at the corners so it would fold easier.
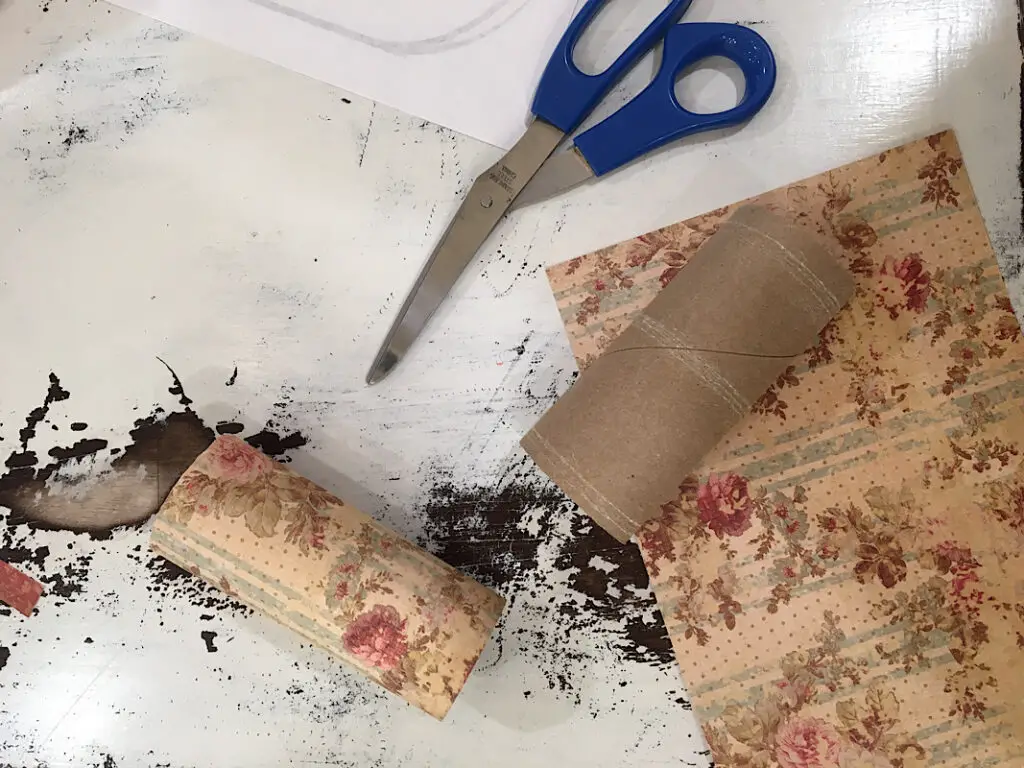
Next, cut one of the toilet paper tubes in half, and wrap each half in paper.
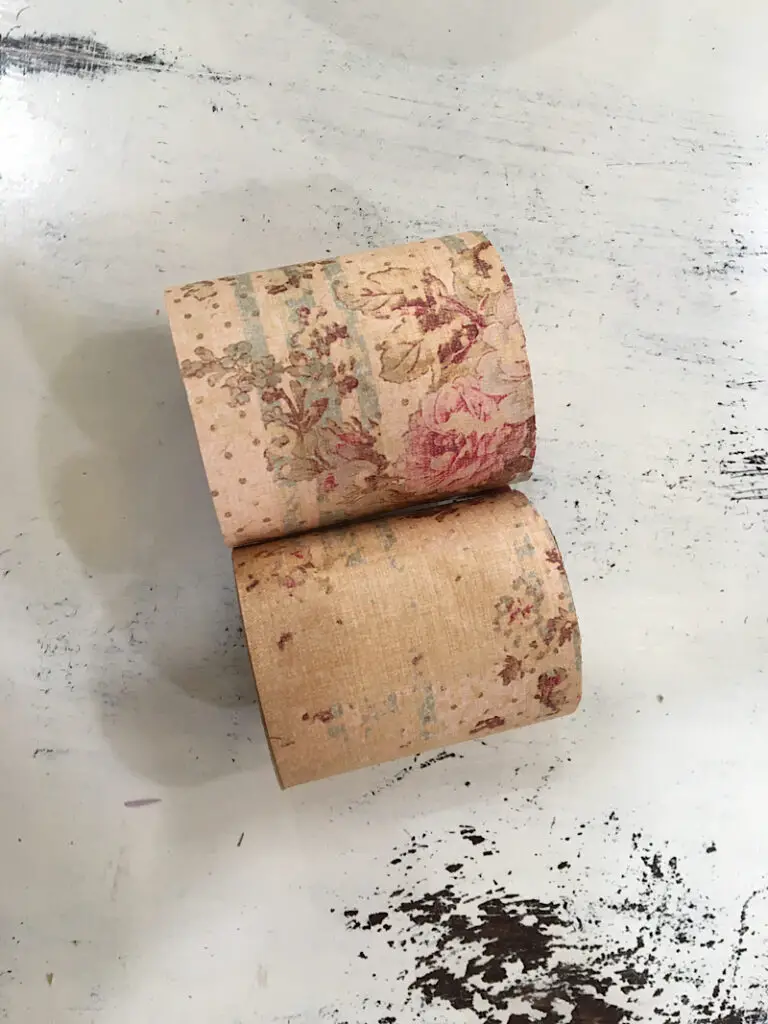
Also wrap the other two toilet paper tubes in paper.
Step 2. Glue The Castle Together
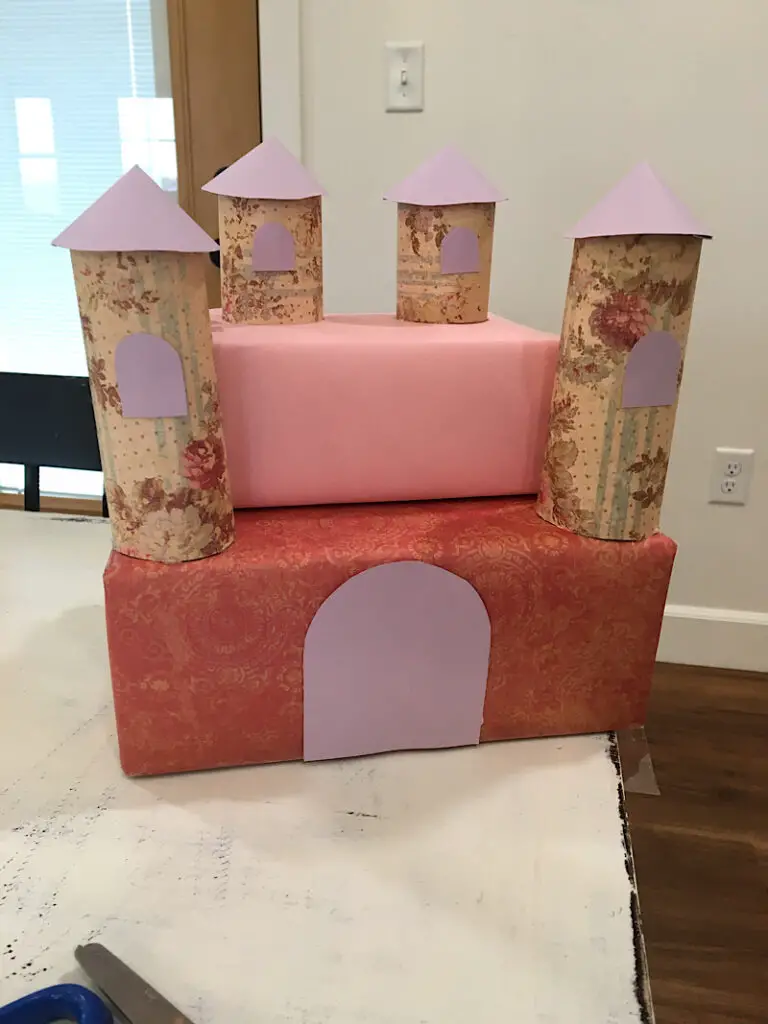
Stack the boxes and toilet paper tubes on top of each other and figure out where you want them to be placed.
With your hot glue gun, glue the smaller box to the top of the bottom box.
Then, glue the two tall toilet paper tubes to the front corners of the bottom box. (You will have to apply glue all around the edge of the bottom of the toilet paper tube, which is tricky, but make sure it is covered well so it is strong!)
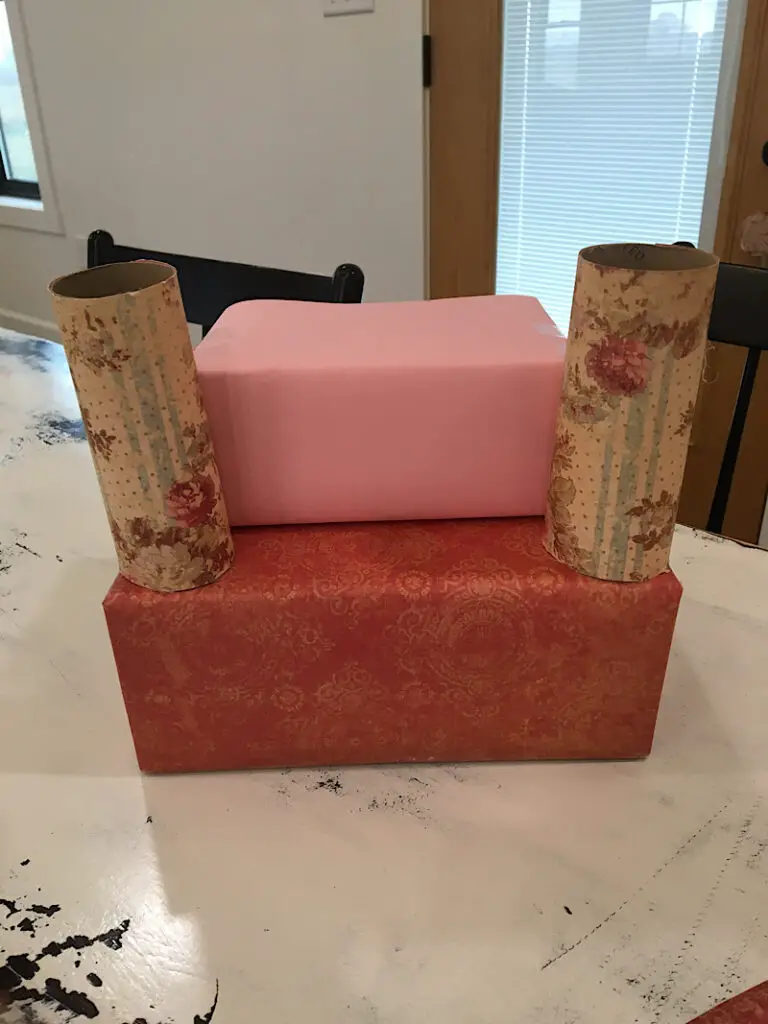
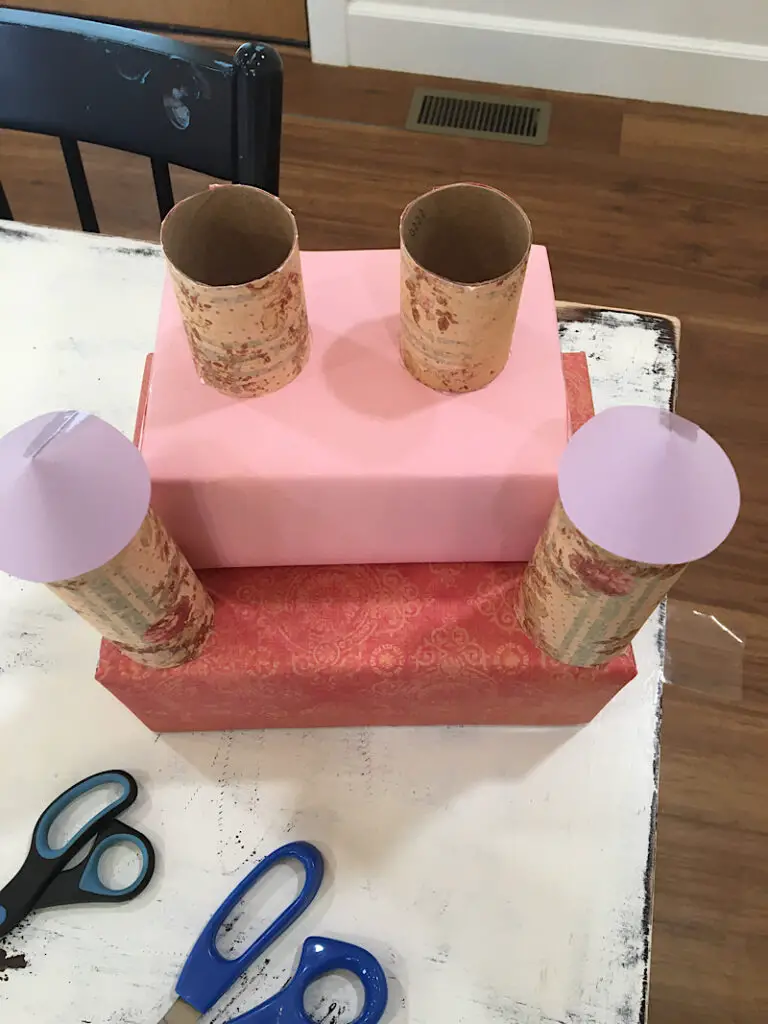
Then attach the two half toilet paper tubes to the top of the little box.
(I forgot to photograph this, here is a picture of how I placed them, we will make the roof in the next step.)
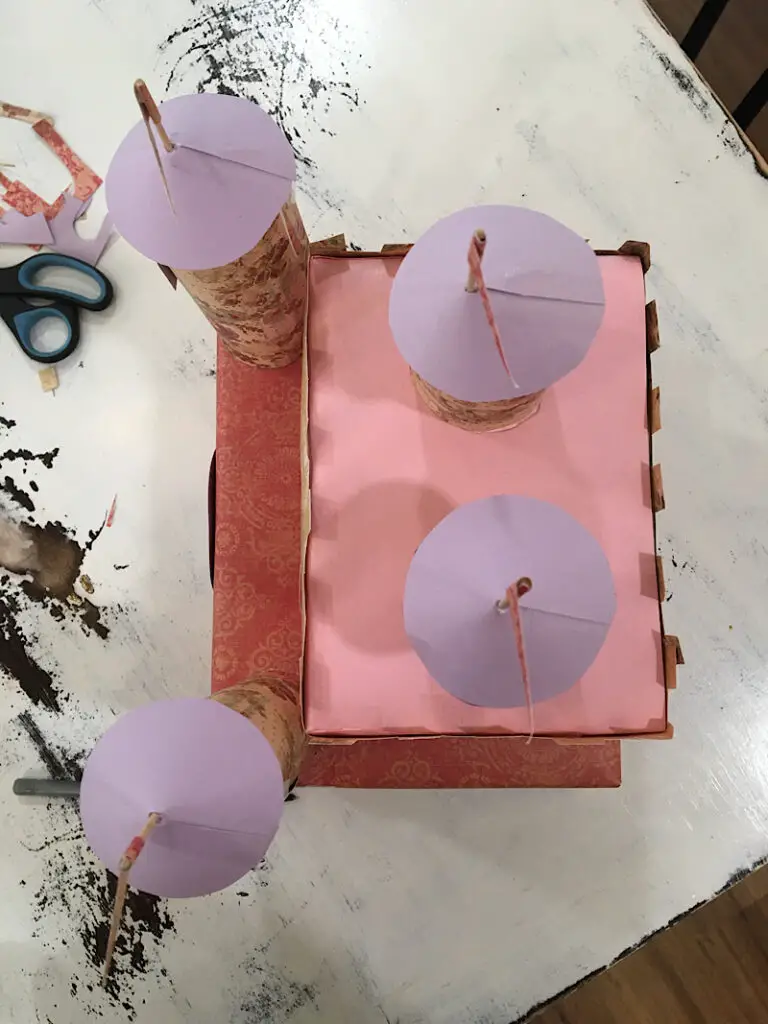
Step 3. Make The Conical Roofs
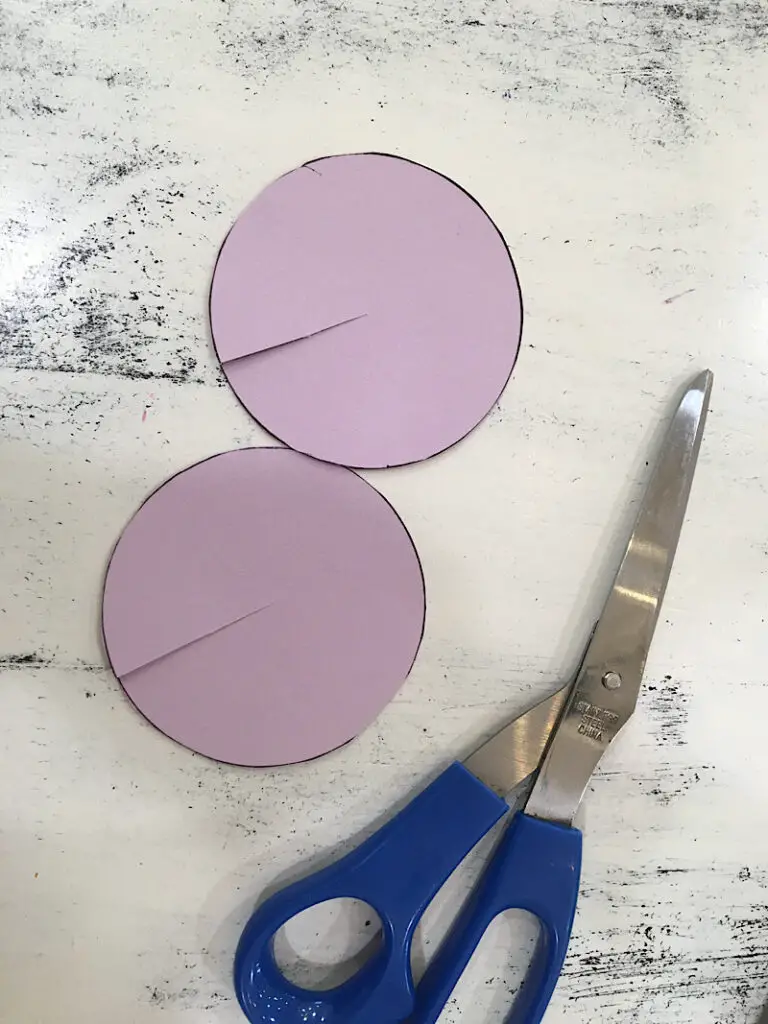
Trace a large cup. lid, or roll of tape to draw 4 circles about 3-4 inches wide on a piece of paper.
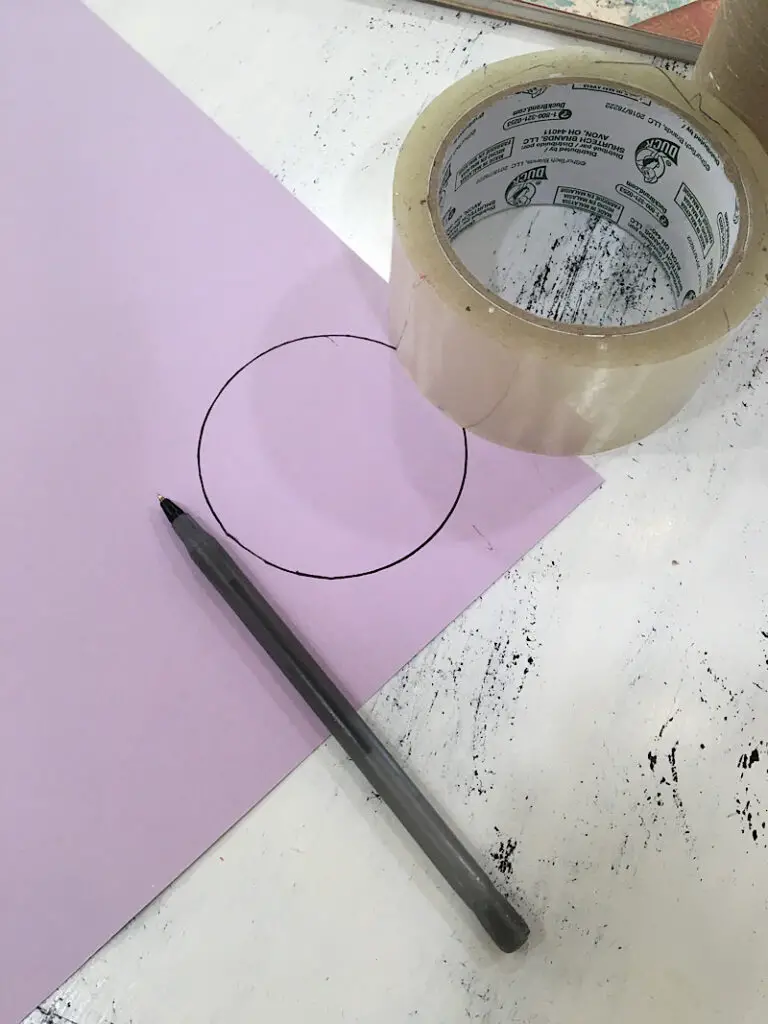
Cut out the circles and then cut a slit to the center of each one.
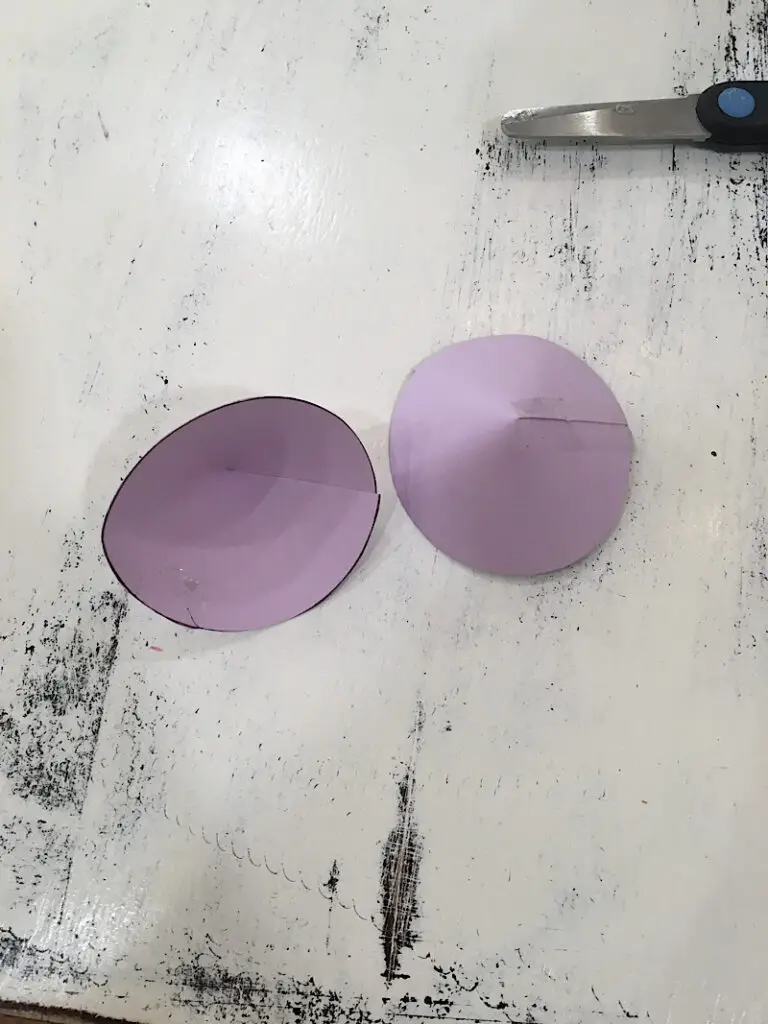
Make each circle into a cone by overlapping the cut edges and taping or gluing them down. (Before gluing it, make sure the bottom of the cone is a good diameter to fit on the toilet paper tube towers.)
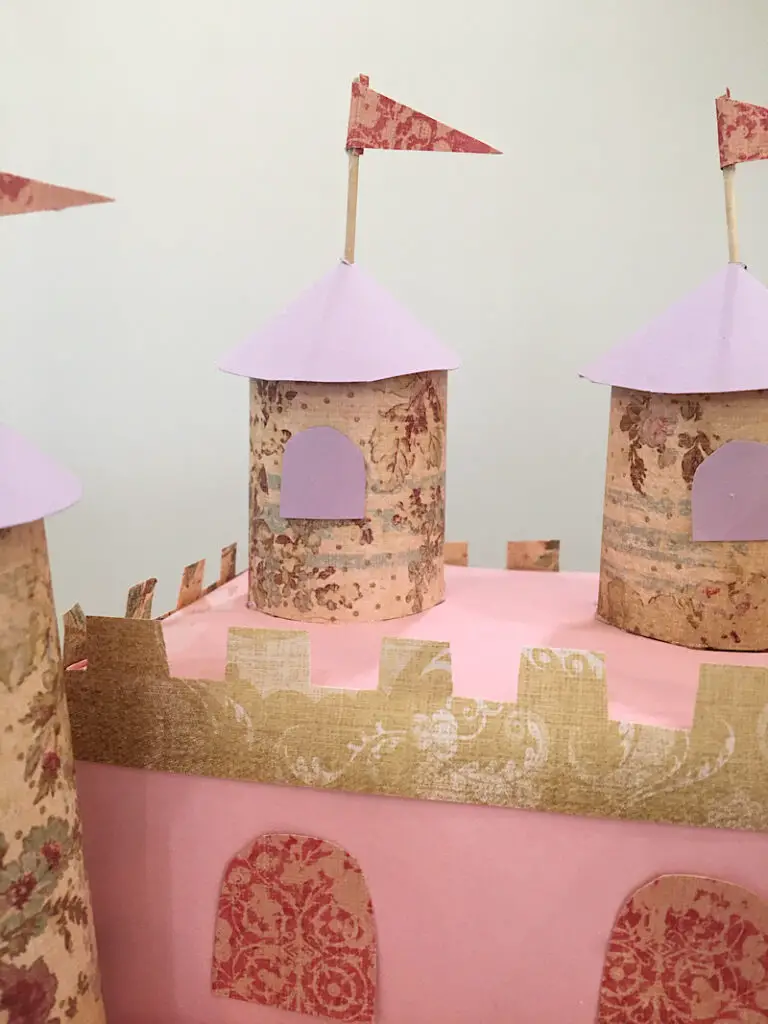
Then with your hot glue gun, glue around the top edge of each toilet paper tube tower and attach each cone roof.

It is starting to looks so cute!
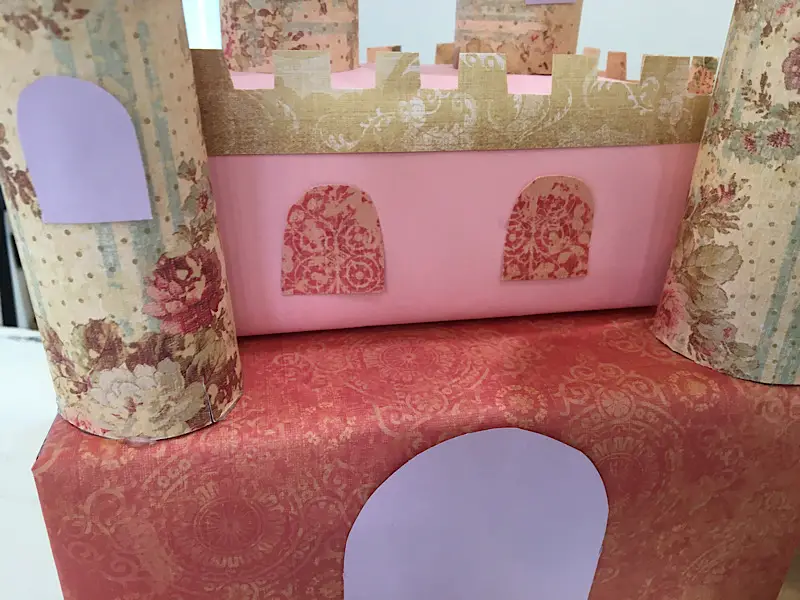
Step 4. Make The Drawbridge Door & Windows
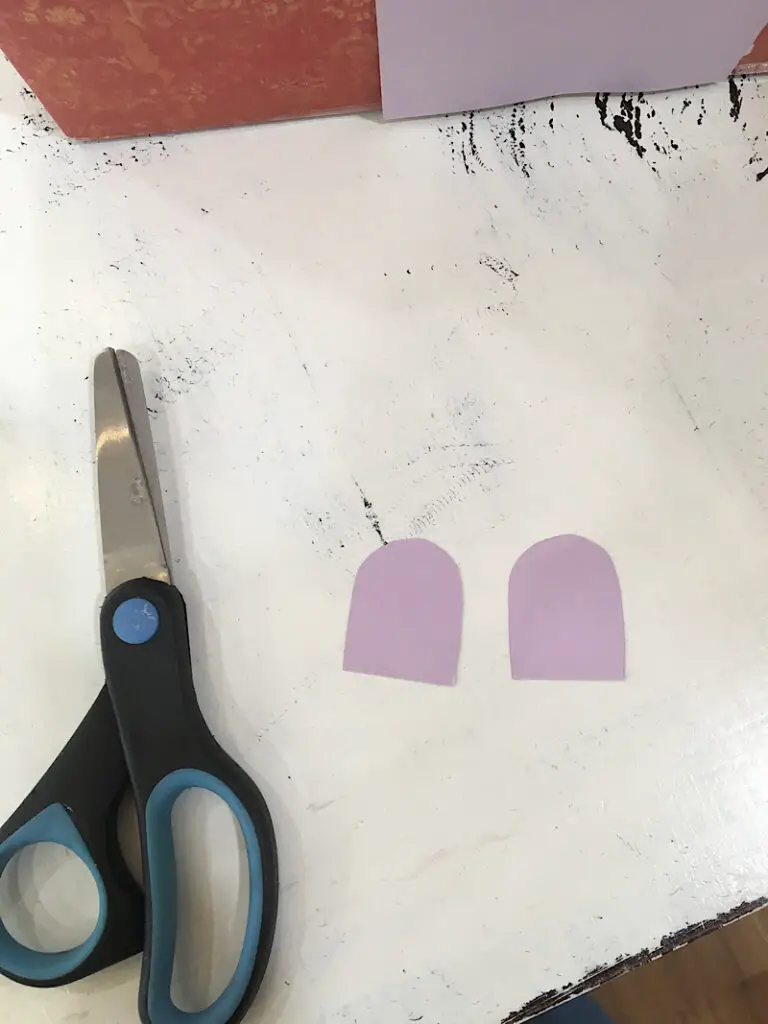
Use another circular item like a roll of tape to trace a circle on some more paper. Then, draw two straight lines down the edges of the circle and give it a square bottom to make an arch shaped door.
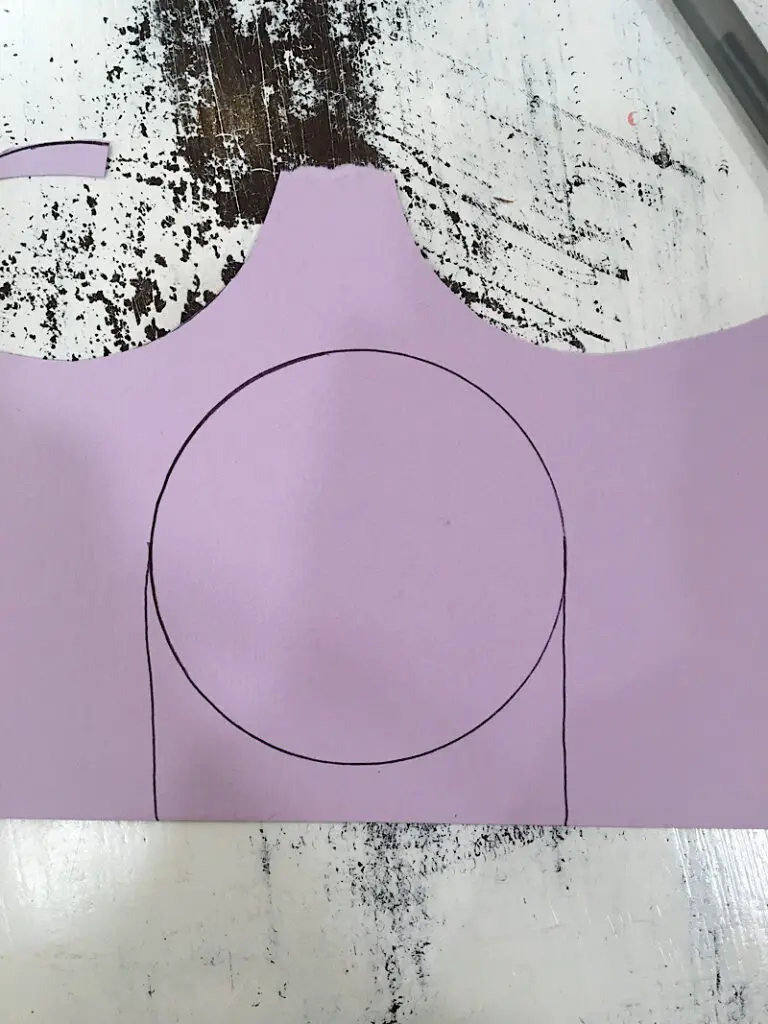
Cut it out and glue it to the front of the castle.
To make the windows, cut out as many little arch shapes as you want and place them on each tower, and anywhere else you like!
Step 5. Decorate The Castle Walls
I added a classic square brick pattern to trim out the top box on my castle.
Cut out a few strips of paper about an inch wide, and cut out a square brick pattern from the strip. This takes a while but is worth it!
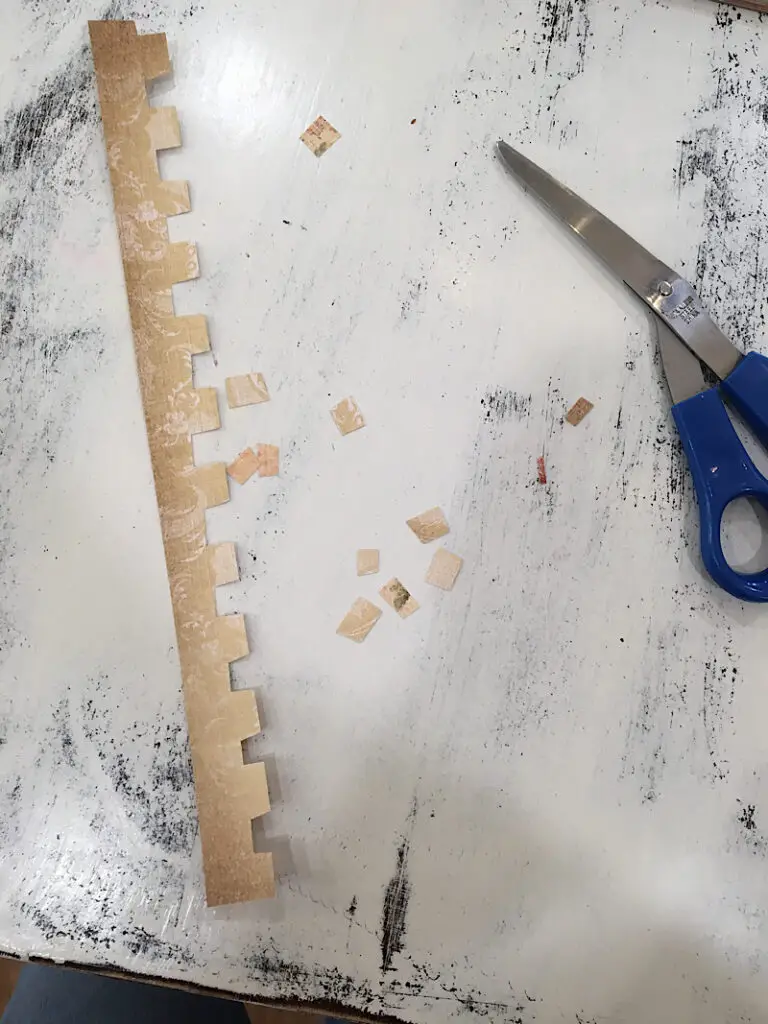
Then glue the paper to the top of the box to trim it out.
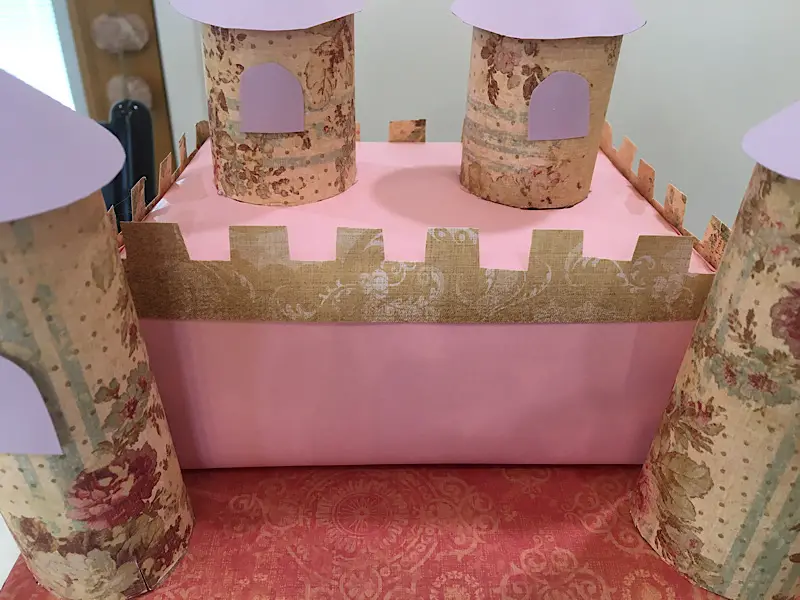
At this point I also added some windows to the front of the top box to add more detail.
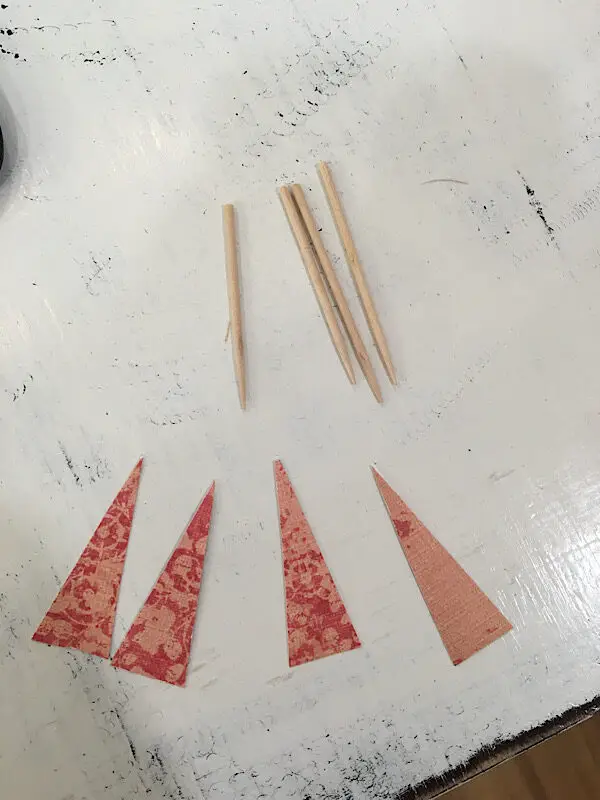
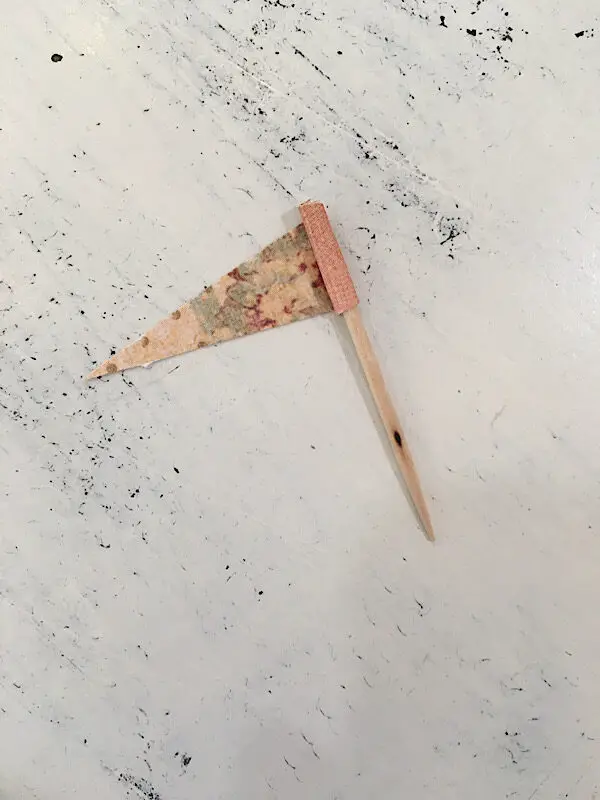
Step 6. Make The Flags
To make the flags that go on top of the cones, cut 4 thin triangles from paper, and glue them to the tops of the toothpicks. I cut the top of each toothpick off to make it flat instead of sharp.
To make the paper stay on better, I wrapped it around the toothpick a little bit.
Then, working one cone at a time, apply glue to the top of the cone and carefully poke the toothpick through the slit in the top. Hold it in place for a second until the glue dries so it stands up straight.
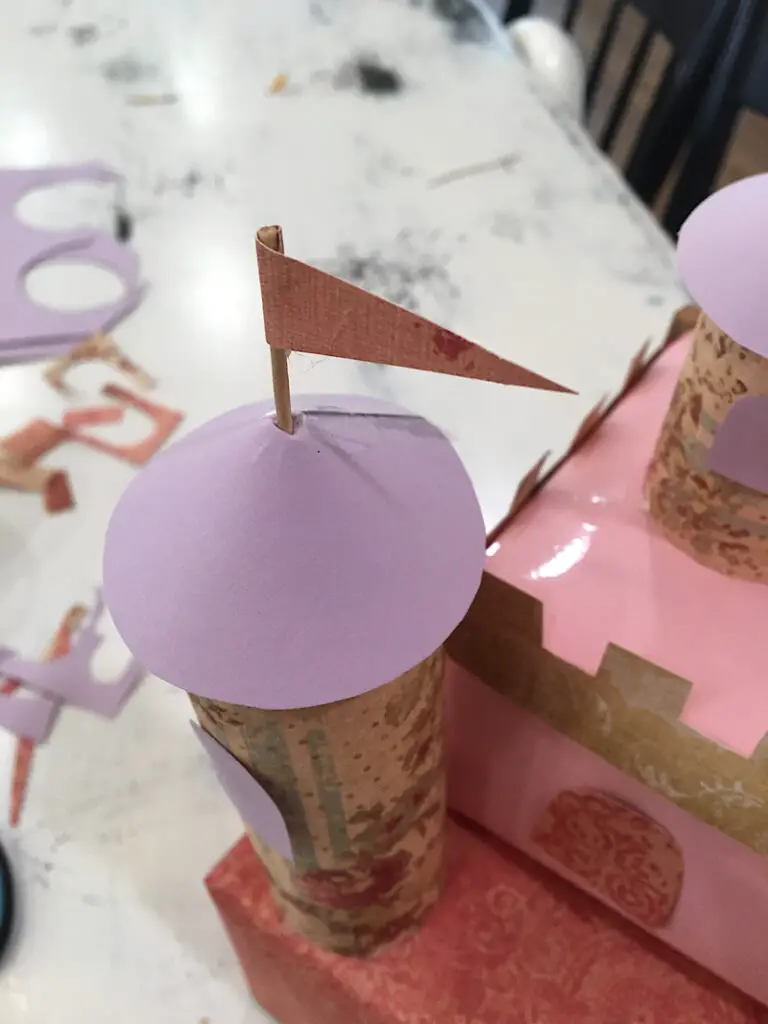
After the flags are set, you are done! You just need to cut out the hole for the cards.
You can cut the hole anywhere you want, on the top, the sides, the back, just make sure it is big enough for a hand to reach into! Maybe you could cut a flap that opens and closes.
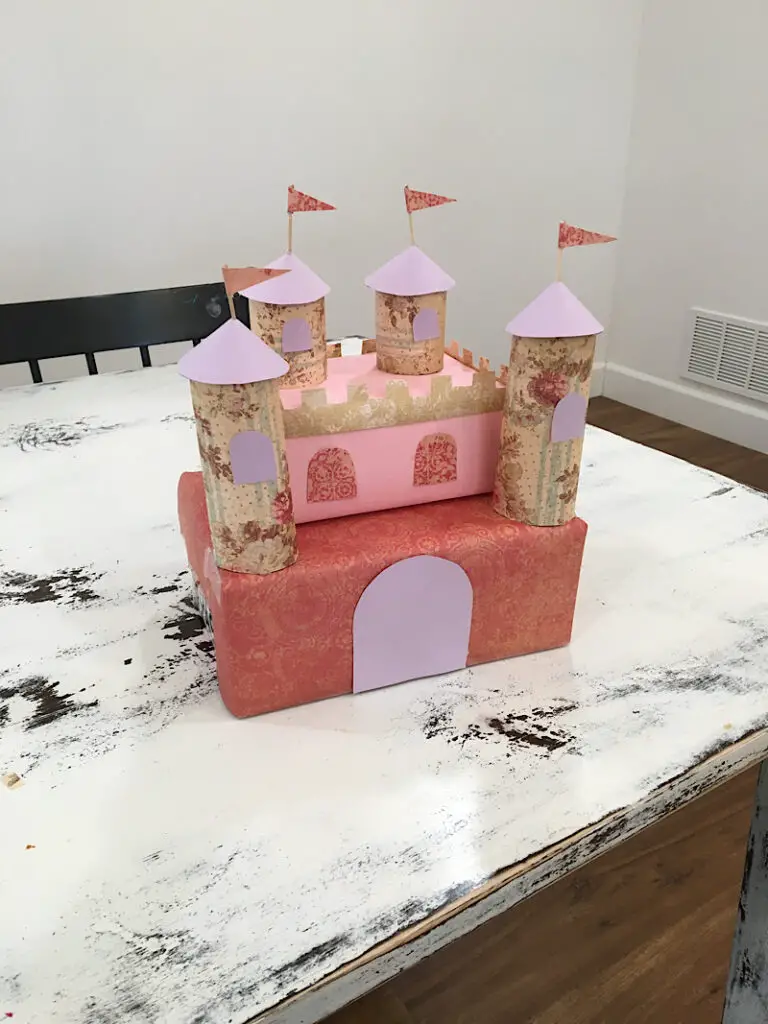
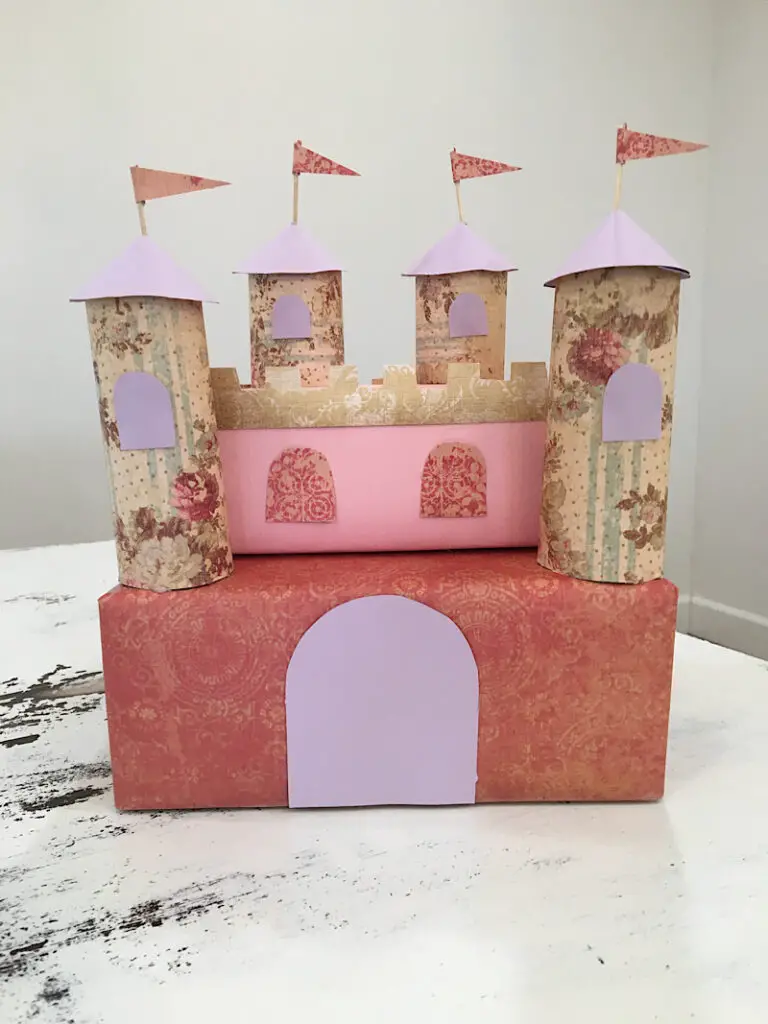
This completes the castle valentines day card box!
Here are some closeups of how mine turned out!
It would be so cute to make a little paper princess to stick in a window or by the door, or find a place to write the child’s name. Perhaps on a flag?
Conclusion
I hope you liked this tutorial! This was so fun to make, I want to make so many box castles now! My girls were in love with it, and they’ve already broken it since they cant put it down, I guess that’s a good thing?…
If you need help with any of the steps please let me know. I am happy to clarify!
Please pin this post to pinterest, it helps me so much!