See how I easily transformed this wall in my tiny bathroom to take is from boring to beautiful!
This post may contain affiliate links. As an affiliate, I make a commission on qualifying purchases at no extra cost to you. See Disclaimer for more details.
I have two small bathrooms in my house, and after my dream-come-true wallpaper makeover I did in the master bathroom, I knew I wanted to do something great to the white wall in the kids bathroom as well!
I did have left over wallpaper but because of how the bathtub insert doesn’t reach up to the ceiling, I thought a half wall accent wall would be easier. I was right!
You can see the sneak peak of the wall in the mirror as you walk down the hall, it is so cute!

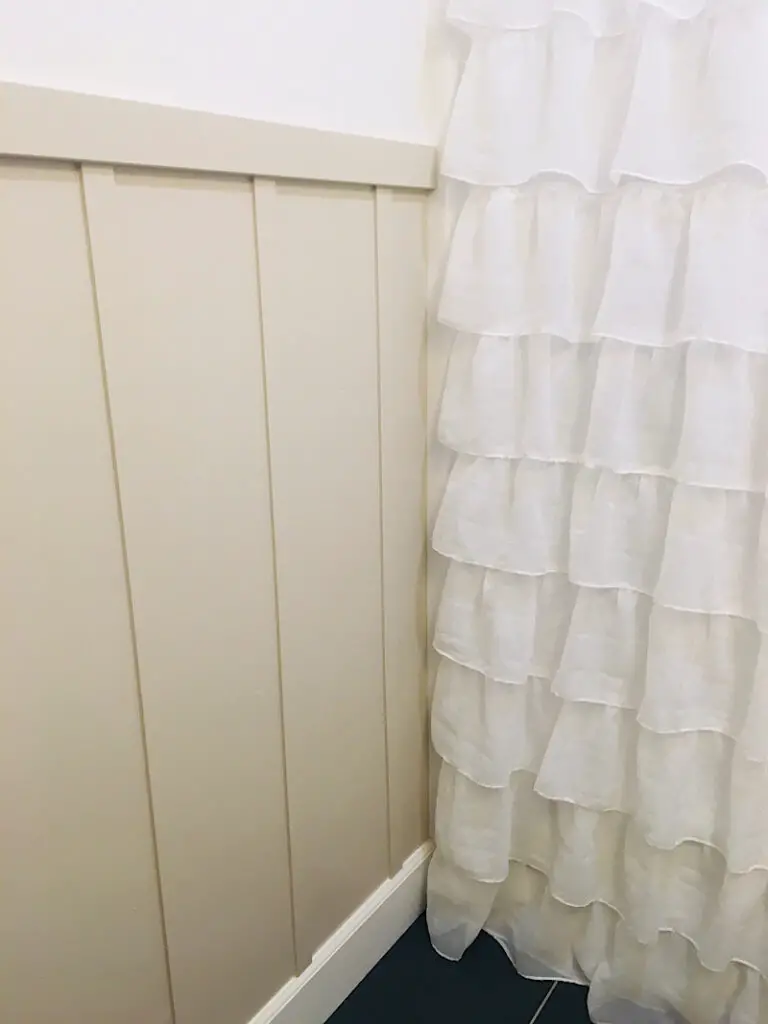
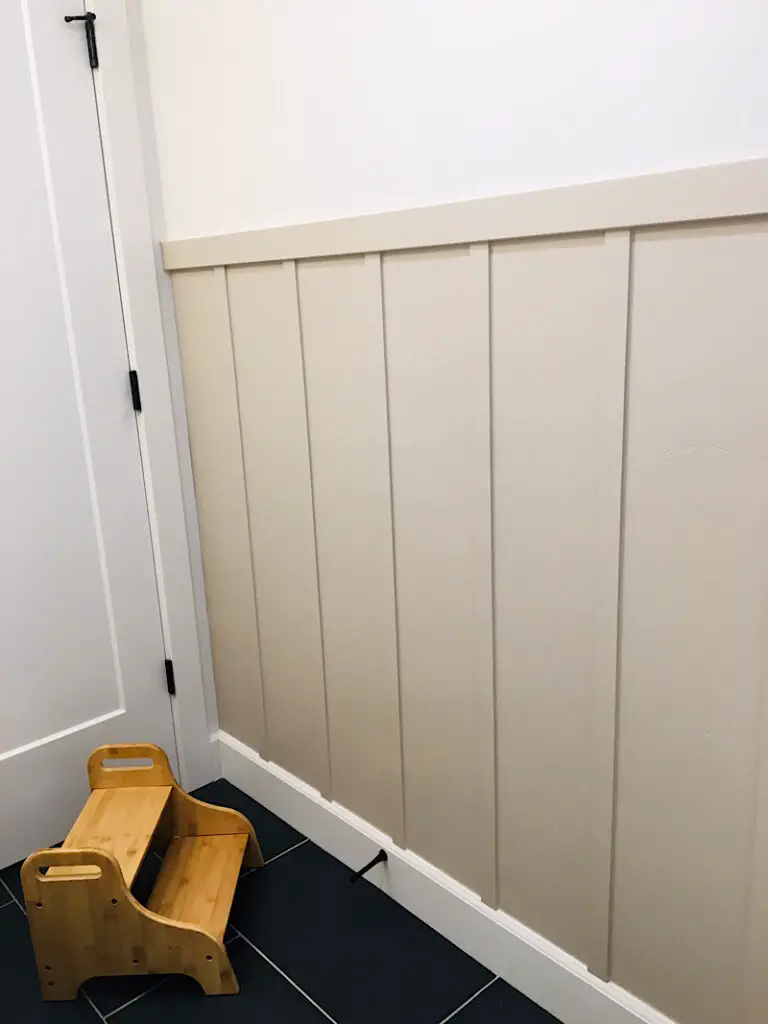
I chose the color “Accessible Beige” by Sherwin Williams in a satin sheen. It is a very classy and grown up color, but what I like most about it is how warm it is without being yellow. It goes well with the cabinets I think.
Here is exactly what I did to achieve this DIY board and batten accent wall!
How To Make A Board & Batten Bathroom Accent Wall
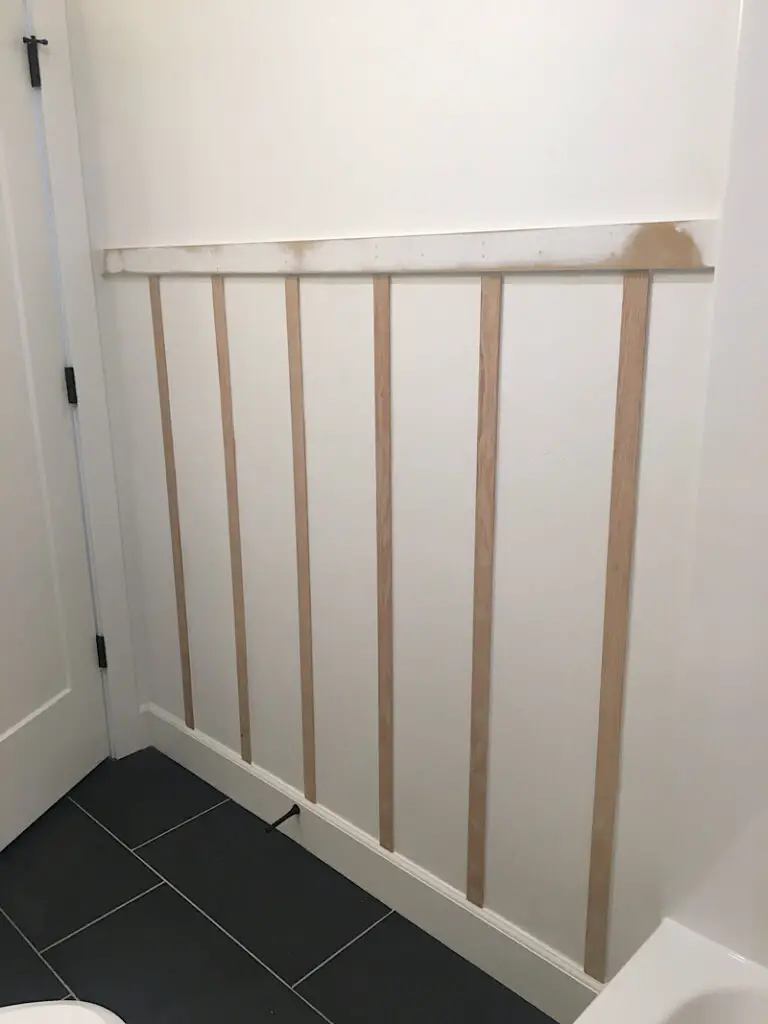
This faux board and batten wall look is easy because all I did was attach the “battens” spaced evenly apart, then added the horizontal board on the top as a header to tie it all together and have a place for the hooks.
Seriously, that is it!
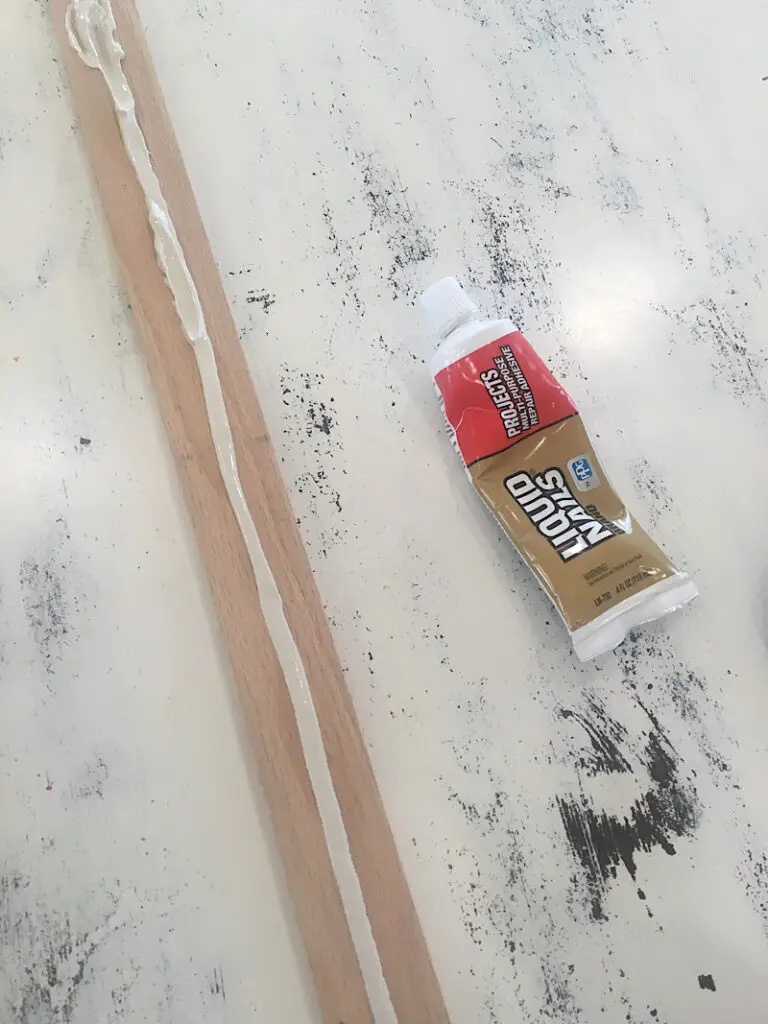
I chose to space the battens closer together than the stud spacing, which is why I used liquid nails with the brad nails.
Project Cost
This accent wall cost us less than $100 (not including the power tools). The cost will change depending on how wide your wall is, ours was less than 6 feet. I also already had the towel hooks, but they weren’t very expensive either. Yay!
I actually have a ton of paint leftover, I should have bought a smaller can!
Supplies Needed
- Ryobi Airstrike Brad Nailer
- 2 inch brad nails
- Liquid Nails glue
- 1/4″ thick 1.5″x4′ oak boards (I used 6 spaced about 10 inches apart)
- 1/2″ thick 4″x6′ MDF trim board (Cut to length)
- Sherwin Williams Accessible Beige Paint
- Primer
- Towel Hooks
- Dewalt Circular Sander
- Wood Putty & applicator
- White Caulk
- Towels, painters tape, brushes, and drop cloths
- Pencil, Measuring tape, and Level
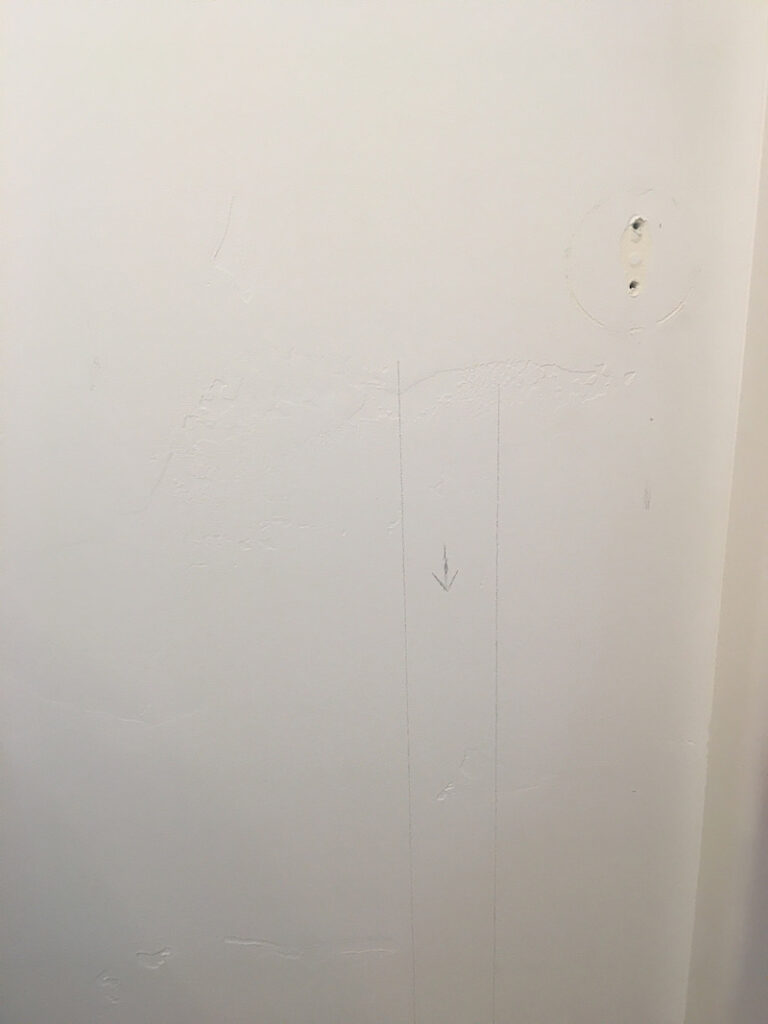
Step 1. Clean & Mark The Wall
Because I was using our wall as the “boards” I needed to make sure there was no dirt or mess that would get in the way of the paint. I washed the wall and used a magic eraser sponge to get off the marks.
I also had an old towel bar that I removed.
Then, using a spirit level we made pencil marks on the wall where we wanting the battens to be attached. We chose to place them every 10 inches.
Step 2. Prepare The Trim
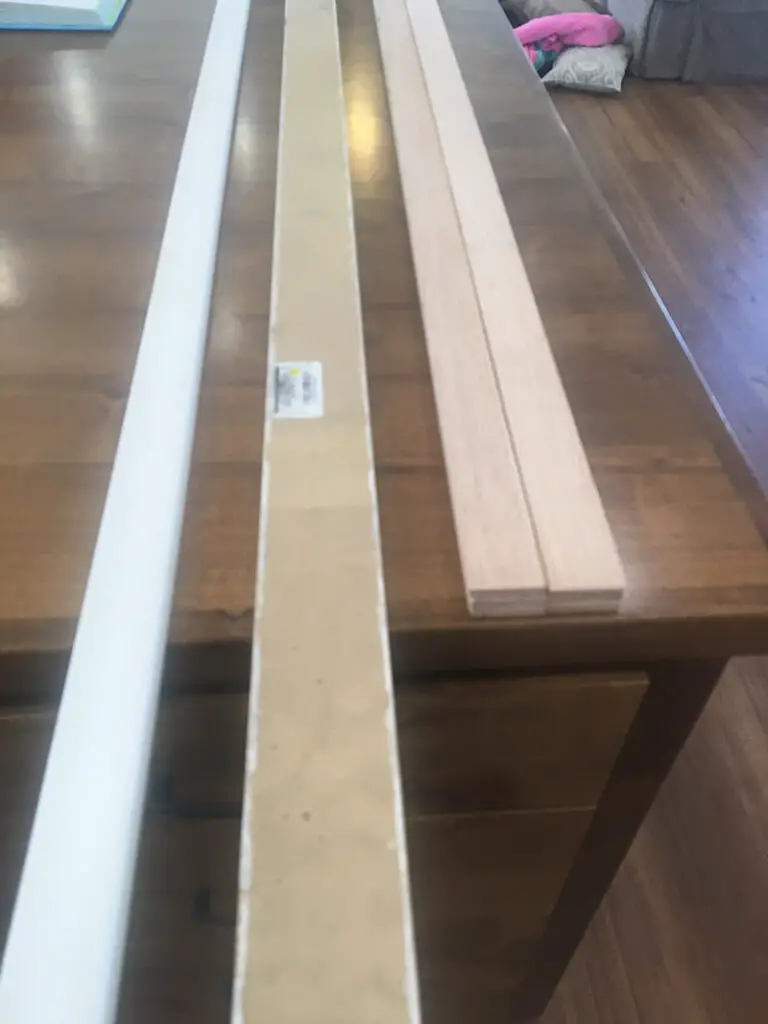
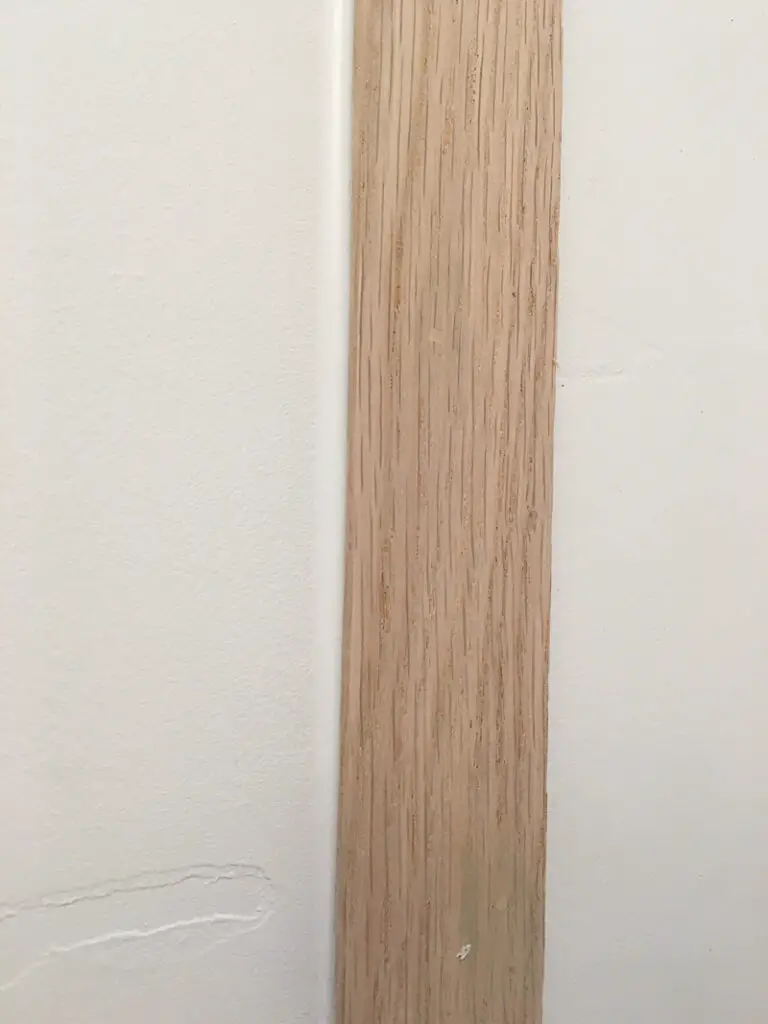
To prepare the oak trim boards I sanded them to make sure they were smooth. I started with an 80 grit sand paper, then used a 120 grit and a 220 grit.
They were 4 feet tall which is how high I wanted the accent wall to be, so I didn’t need to cut them shorter.
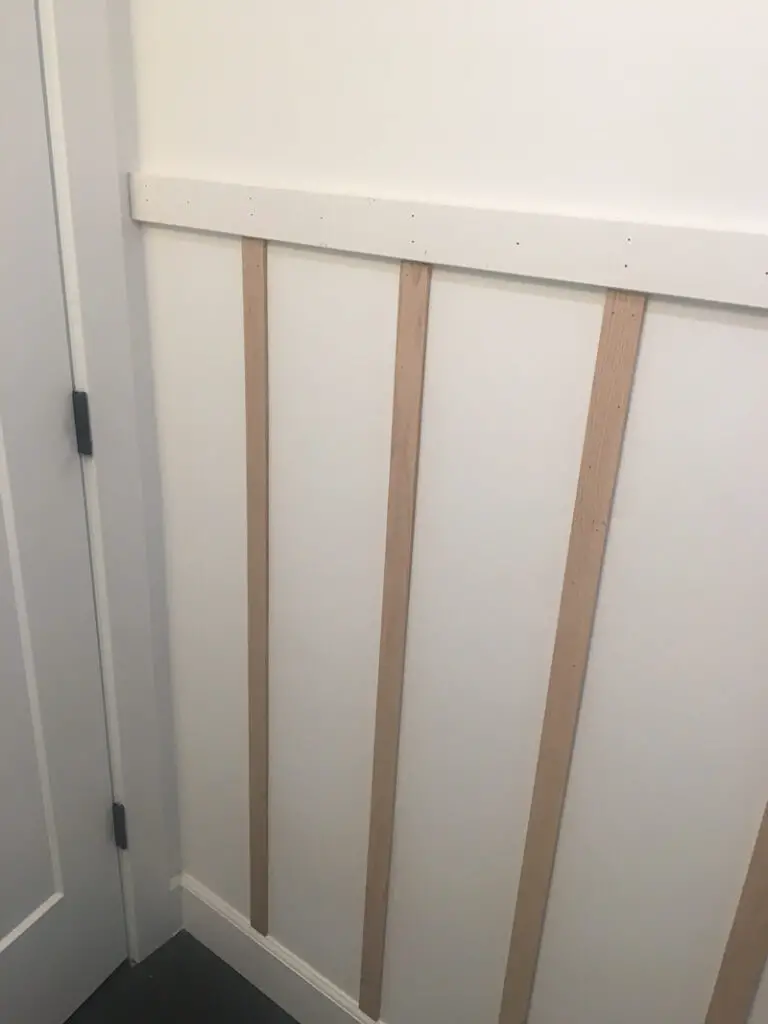
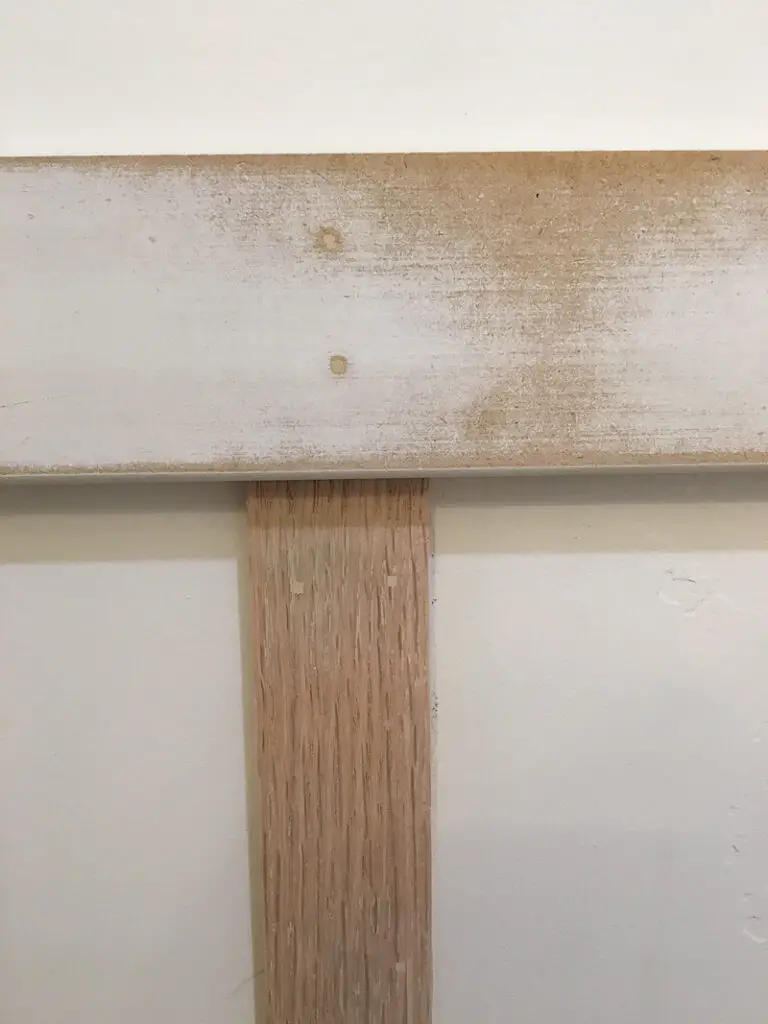
The MDF piece that I used for the header was cut to be the width of our wall.
Step 3. Attach The Battens & Header
To attach the battens, I applied a line of liquid nails glue to the center back of each batten.
Then I held the batten up to the wall on the marks we had made and my husband nailed them in place with the brad nailer.
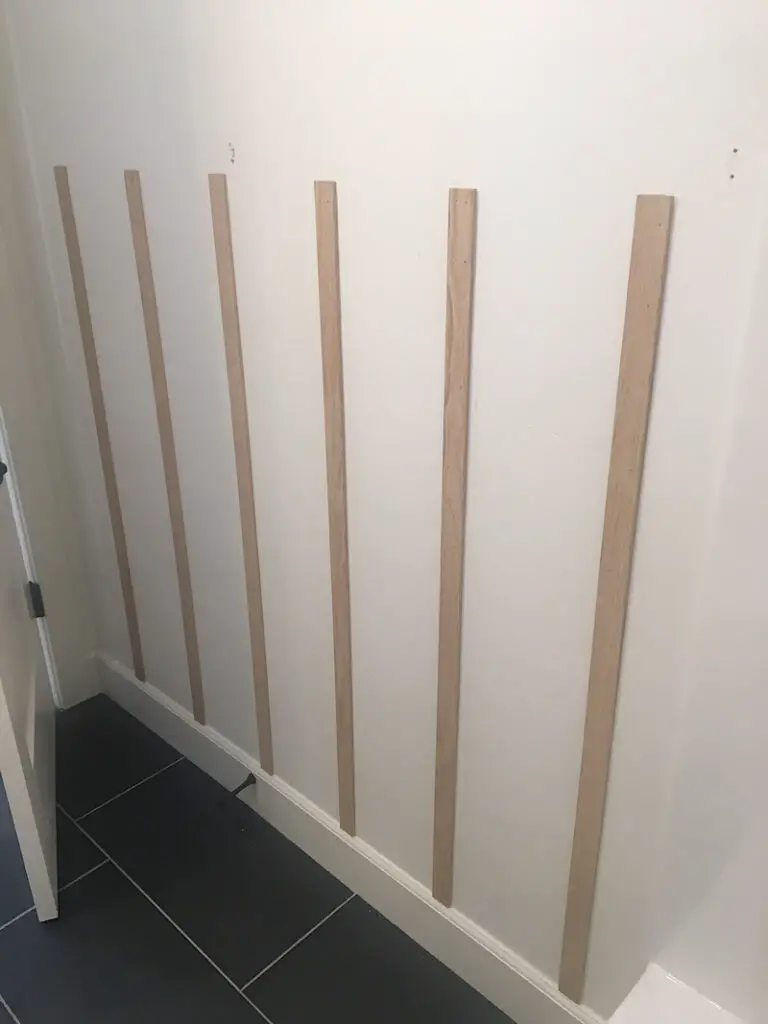
Make sure not to nail too close to the ends of the battens or you might split the wood.
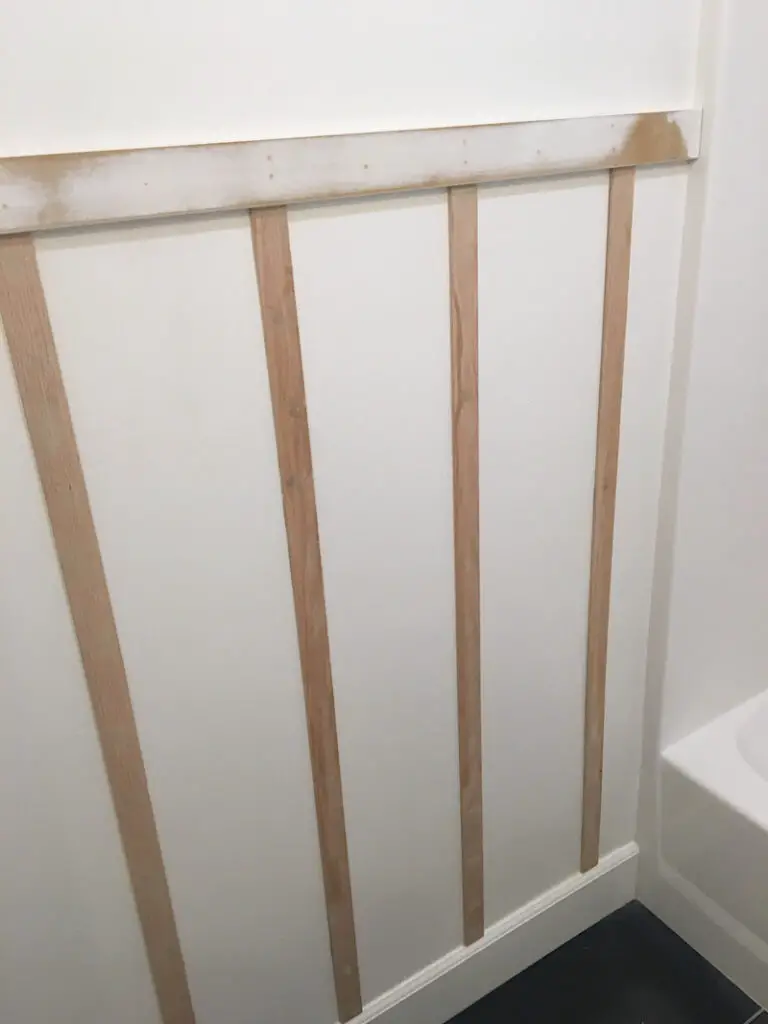
After nailing all the battens, we glued and placed the header trim on top, and nailed it on as well.
Step 4. Fill The Gaps & Caulk The Seams
After attaching the trim there were a lot of holes where the nails were, so I used wood filler putty to fill in each hole.
I let it dry over night and then used the sander to sand away the excess and make it perfectly smooth again.
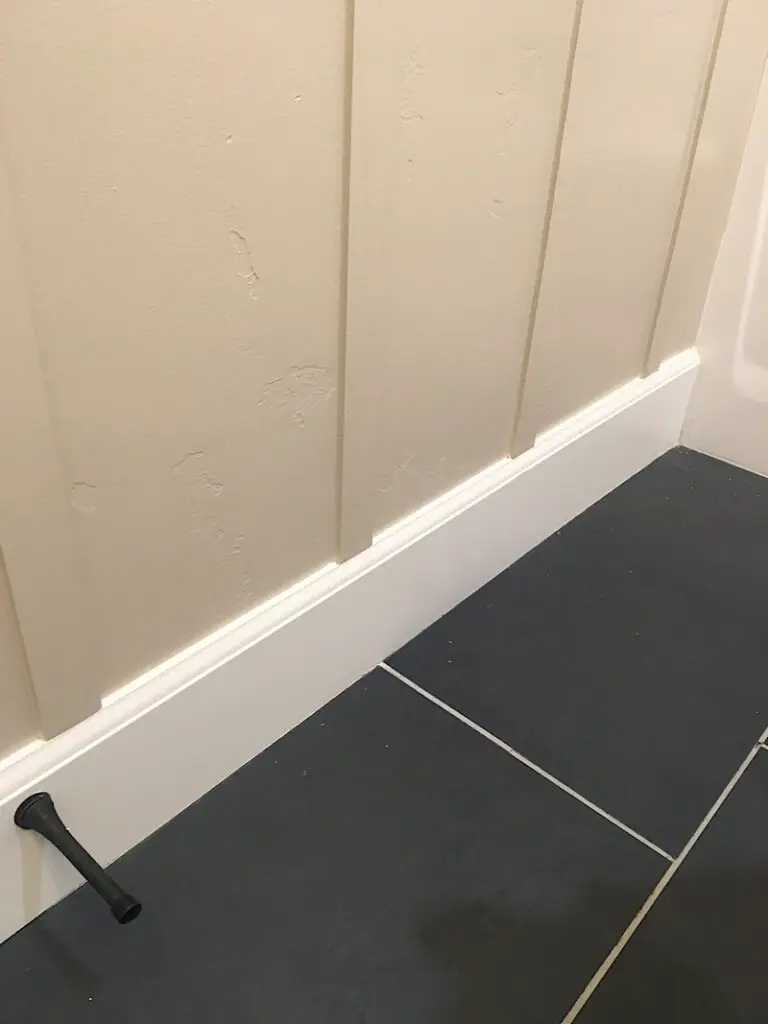
Then, I used white paintable caulk to seal all the seams and edges of the accent wall.
At this point it was looking really good, and I could imagine how it would turn out. It was exciting!
Step 5. Prime & Paint The Trim
After the caulk dried, I primed the trim pieces to prepare them to accept paint and make them white. I just did one quick coat.
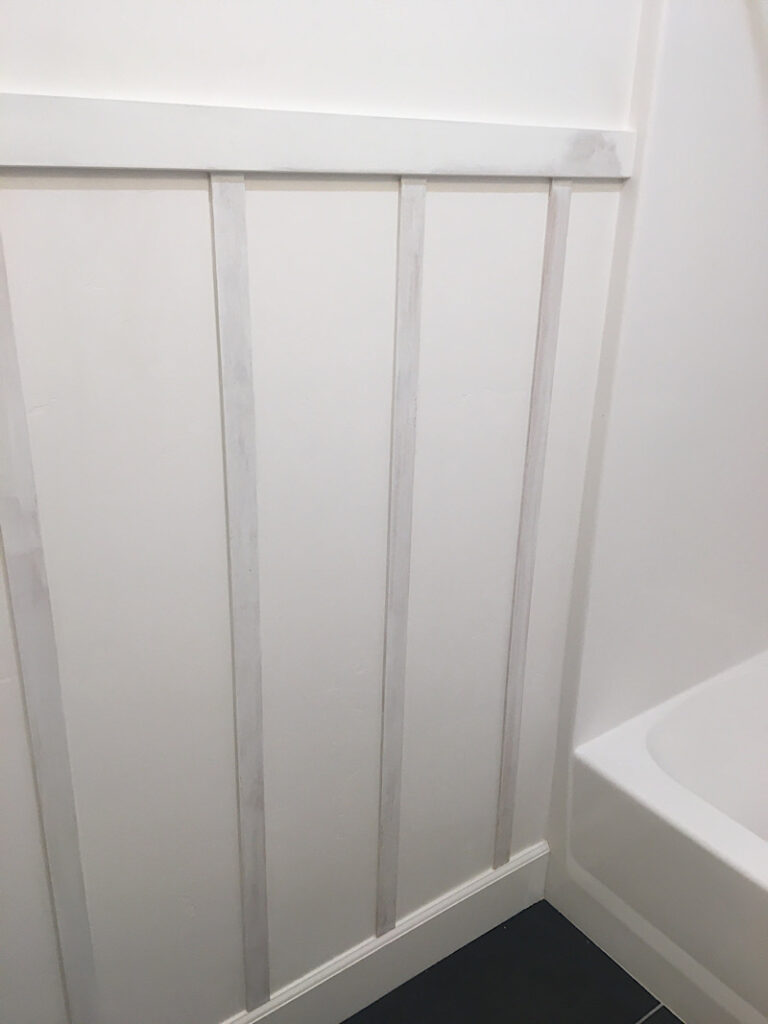
Then, I taped off the wall to make sure no paint would get on the baseboard or bathtub, and put a plastic cloth down to protect the tile floor.
Then I was ready to paint. I used a nylon brush to reach in all the corners and edges first, then I used a roller to paint the large areas and give it the rolled texture.
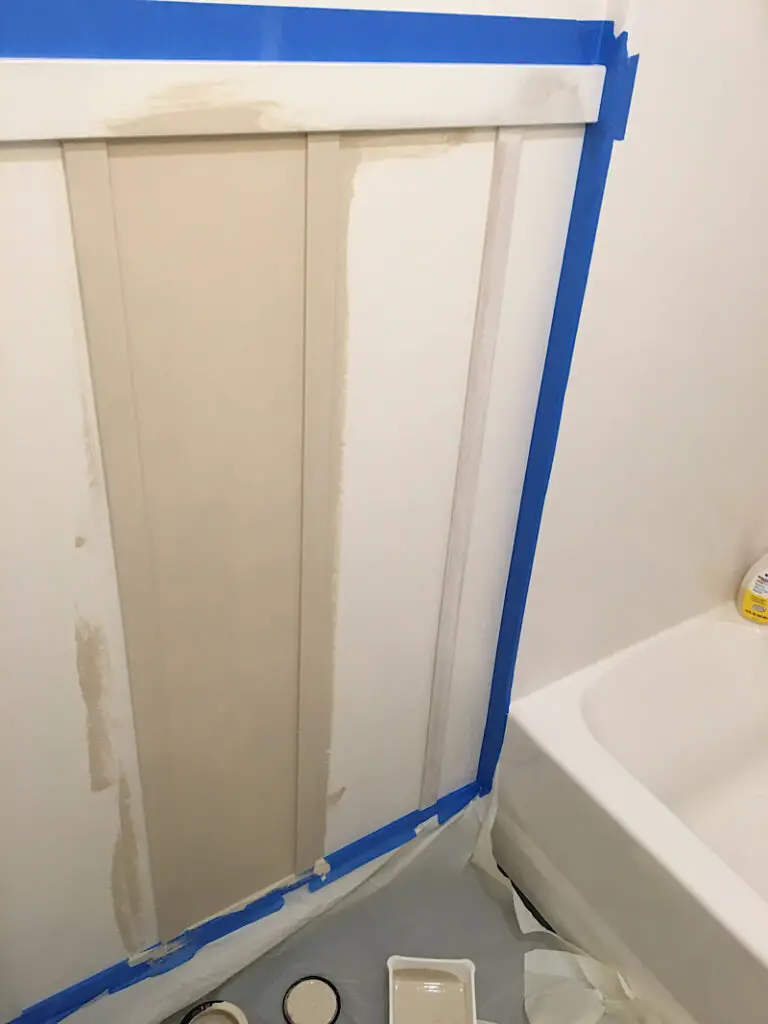
After painting the first coat I let it dry over night with the fan on, then applied a second coat in the morning.
Here is the second coat before it was dry.
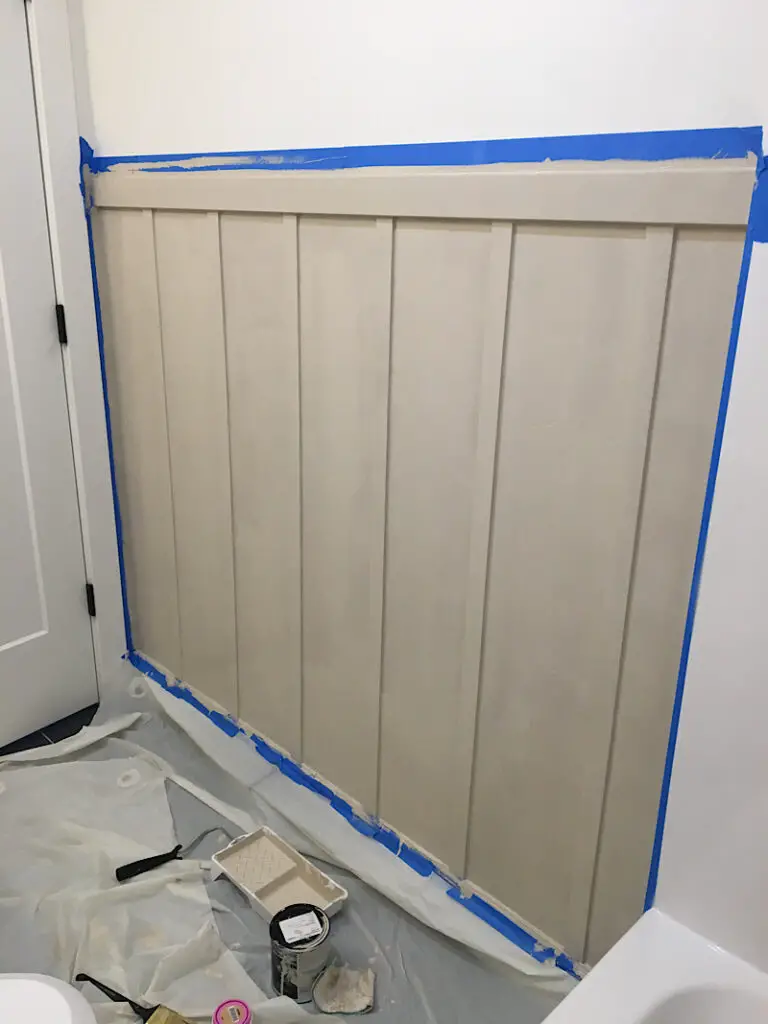
After the second coat of paint dried, I carefully removed the tape by scoring the edges with a razer and then pulling it away.
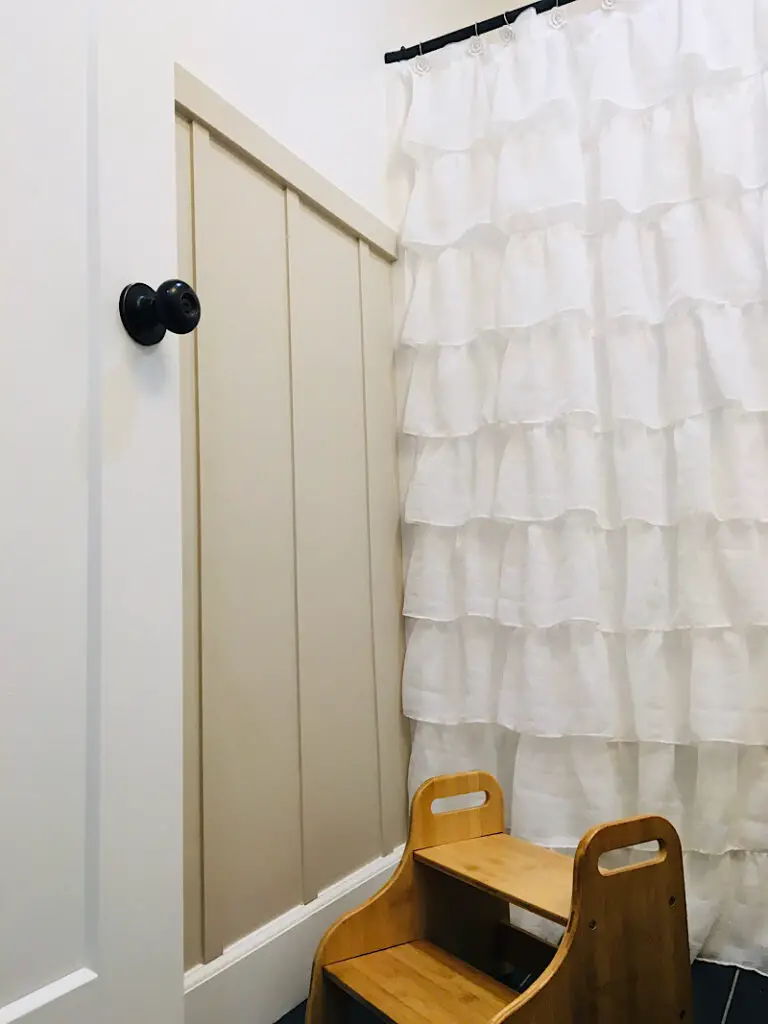
It looked so awesome, I was over the moon!

It is such a small bathroom I can’t get a great photo of it without taking the door off, but here are some more shots:
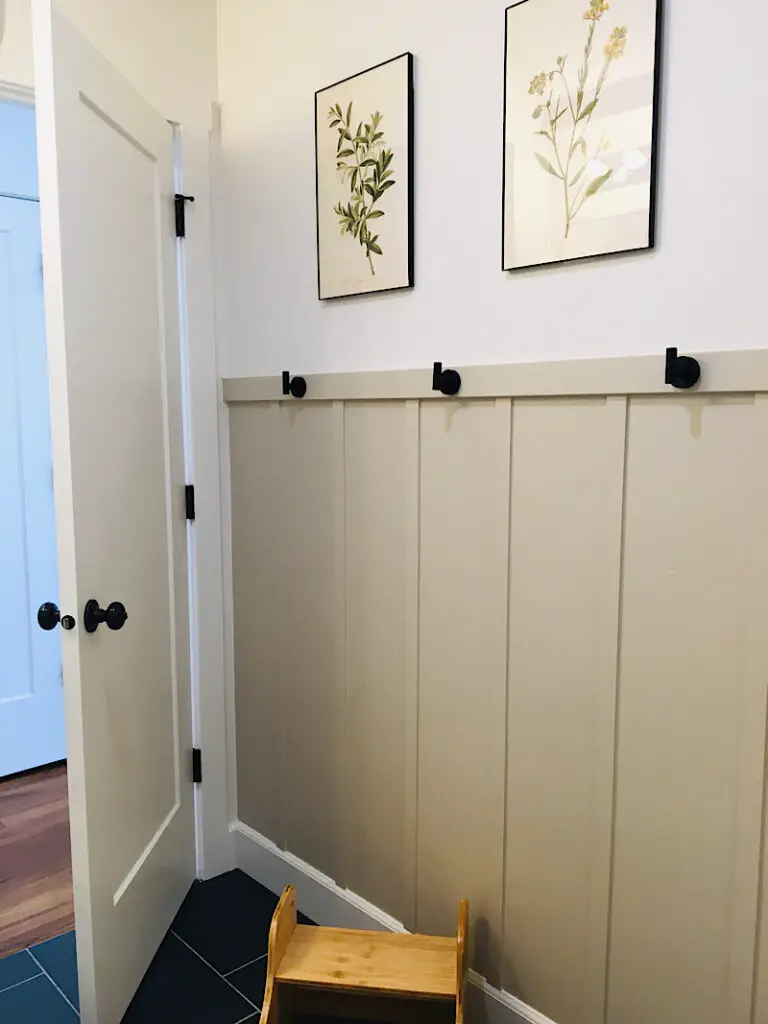
The wall is now complete! I think I will have to finish it off by adding some cute towel hooks and some framed art above it, which I will photograph and add to this post when I do.
UPDATE:
We added the hooks and I also added to large botanical prints above that I designed. They are an olive branch, and a mustard branch.
I am so in love!
Conclusion
I was so pleasantly surprised how easy and fun this wall was!!! Every time I walk passed the bathroom I have to stop in just to look at it… It looks so professional I can’t believe we did it ourselves. This was our first time using a brad nailer and doing any kind of trim work.