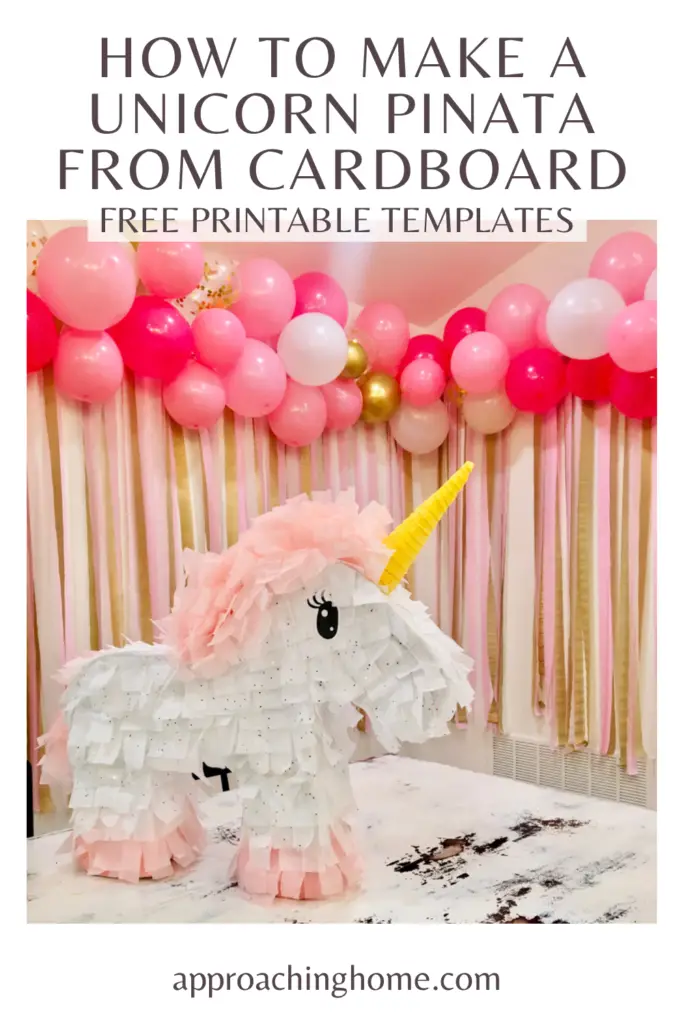
Want to learn how to make your very own unicorn pinata? These are perfect for a magical themed baby shower or birthday party! If you’ve got time, tape, and glue, and a few other materials, you can do it! Let me teach you how to make a pinata from cardboard… I promise, this is a pretty easy craft to figure out even though it looks complicated!
Only once does a little girl turn 4, and when it happens, a unicorn party is in order.
I wanted to go all out for this unicorn party, but I also wanted to keep a tight budget. I ended up DIYing all the decorations and crafts and it turned out great.
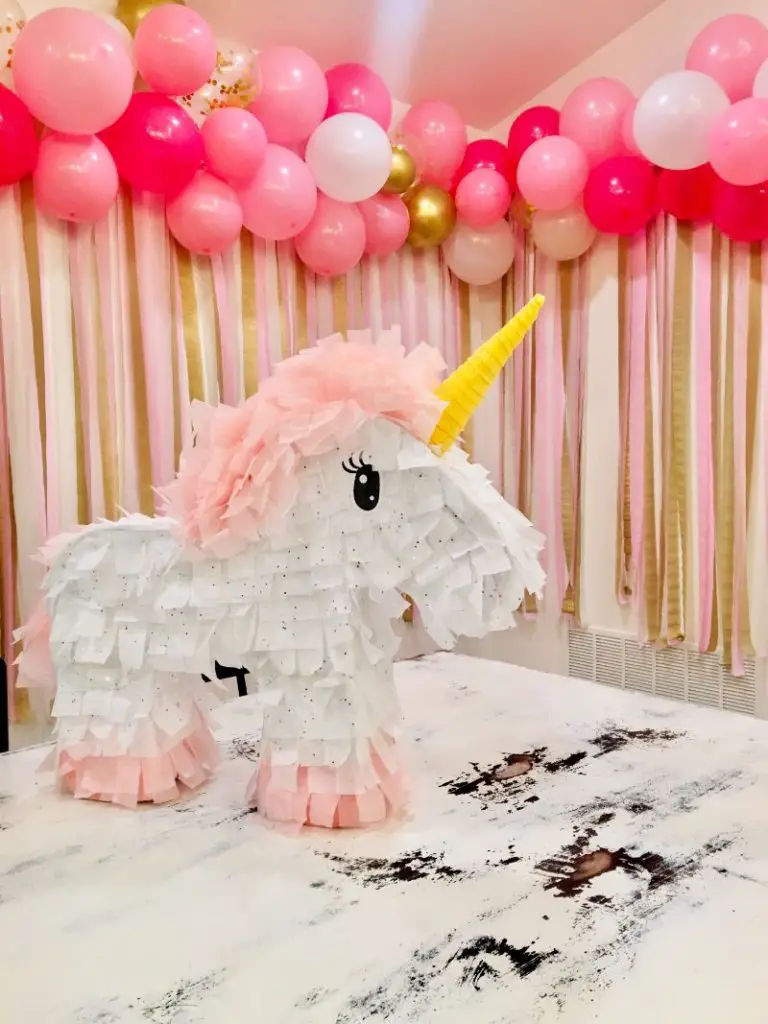
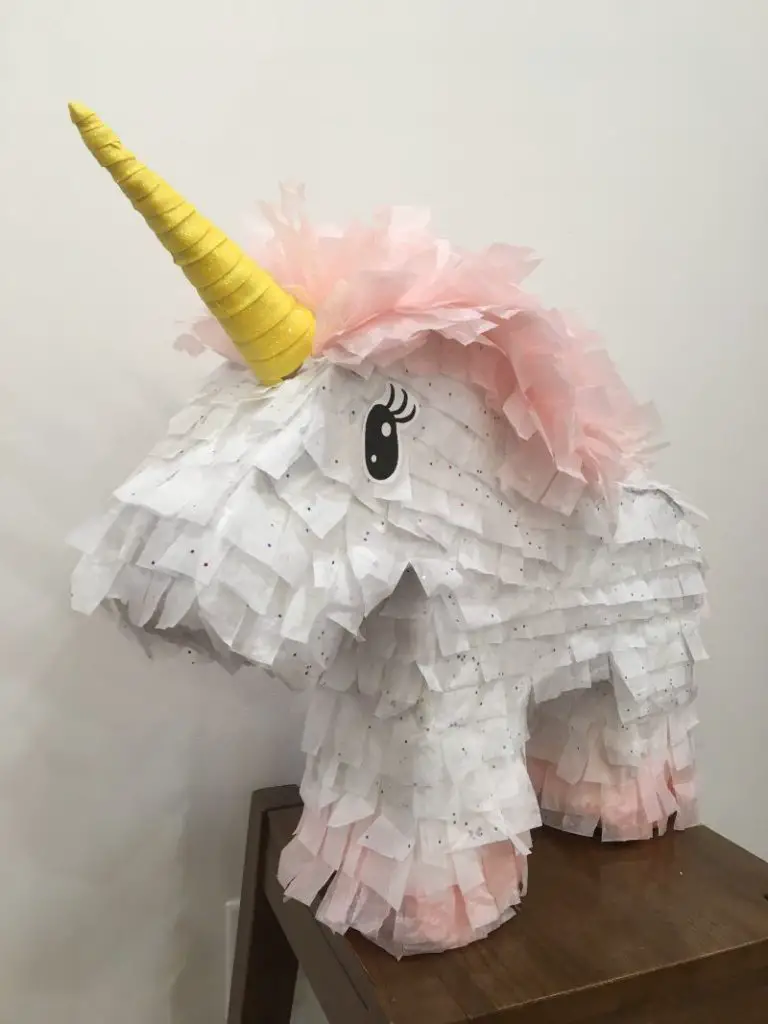
The centerpiece of the party was this super cute DIY Unicorn Pinata I put together. It is seriously so adorable, and surprisingly sturdy and easy to make at home!
Supplies You Will Need to make a Unicorn Pinata:
This project calls for quite a few supplies. However, you can certainly use what you have around your house. It was free for me since I had everything in my craft closet!
- Cardboard (I just used an old box or two.)
- Packing Tape
- Scissors
- A marker or pen
- Craft Glue (I used Elmers glue. You could also use modge podge)
- Tissue paper for the body of the unicorn. (I literally just saved the tissue paper we got in our Christmas gifts to reuse for this project, ha! You will want enough to cover it well, perhaps 10 sheets or more as a rough estimate depending on the size of the paper.)
- Another color of tissue paper for the hooves mane and tail (1-2 sheets for the hooves, and 4-8 for the mane and tail depending on how long and full you want to make them)
- Acrylic paint that matches your tissue colors (or you can just use white, or none at all. The paint helps you use less tissue paper since it covers up the brown cardboard. If you don’t want to use paint before applying the tissuepaper, you can simply modpodge flat pieces of tissue paper all over the unicorn first to give it a base that matches.)
- Sparkly foam, paper, or more tissue paper to cover the horn
- Hot Glue gun
- The free pattern printable included in this blog post. (For the eyes and unicorn outline. You could also just draw your own if you want!)
How to Make a Unicorn Pinata From Cardboard
Step 1. Print and Cut the Unicorn Template
Download the unicorn outline PDF, and the Unicorn Eyes PDF below.
Print them at 100% scaling, and measure the 1 inch test square to make sure it is the right size.
Cut it out along the black lines, and add glue to the grey boxes. Overlap the pieces over the gray boxes and glue the unicorn together.
Trace your unicorn template onto a flat piece of cardboard. I just used a flattened cardboard box.
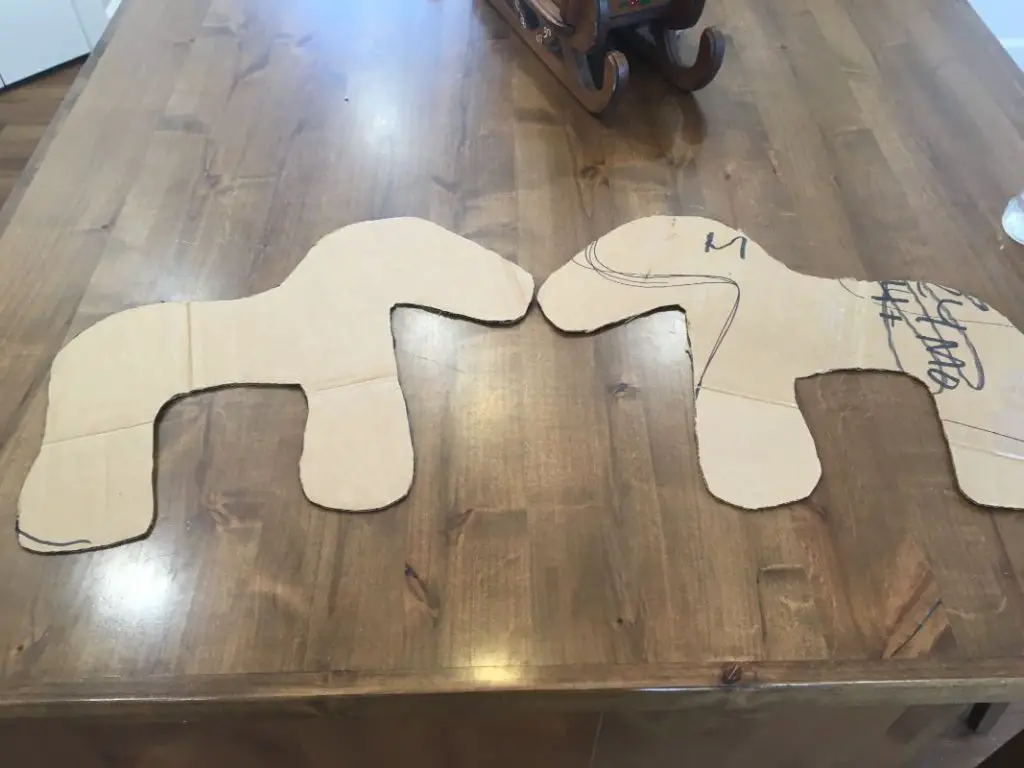
Trace it again, and cut out another unicorn template for a total of 2 unicorn cardboard cutouts.
Step 2. Make the Cardboard Edging Strips
These edging strips are what makes your unicorn pinata 3D. You can make it fat or thin based on how wide these strips are.
I cut out my cardboard strips to be about 4 inches wide.
Cut out many 4 inch thick strips of cardboard, enough to bend around the unicorn’s entire outline. I used a heavy duty paper cutter to make this job easier, but scissors will work fine too.

Make sure all the strips are uniform in thickness. The length doesn’t matter as much, but I found that 12 inch long sections were easy to work with.
Step 3. Tape the Cardboard Strips to the Unicorn Cutout.
Working your way around the unicorn, bend the cardboard strip and tape it’s edge to the edge of the unicorn cutout. The strips should be perpendicular to the unicorn.
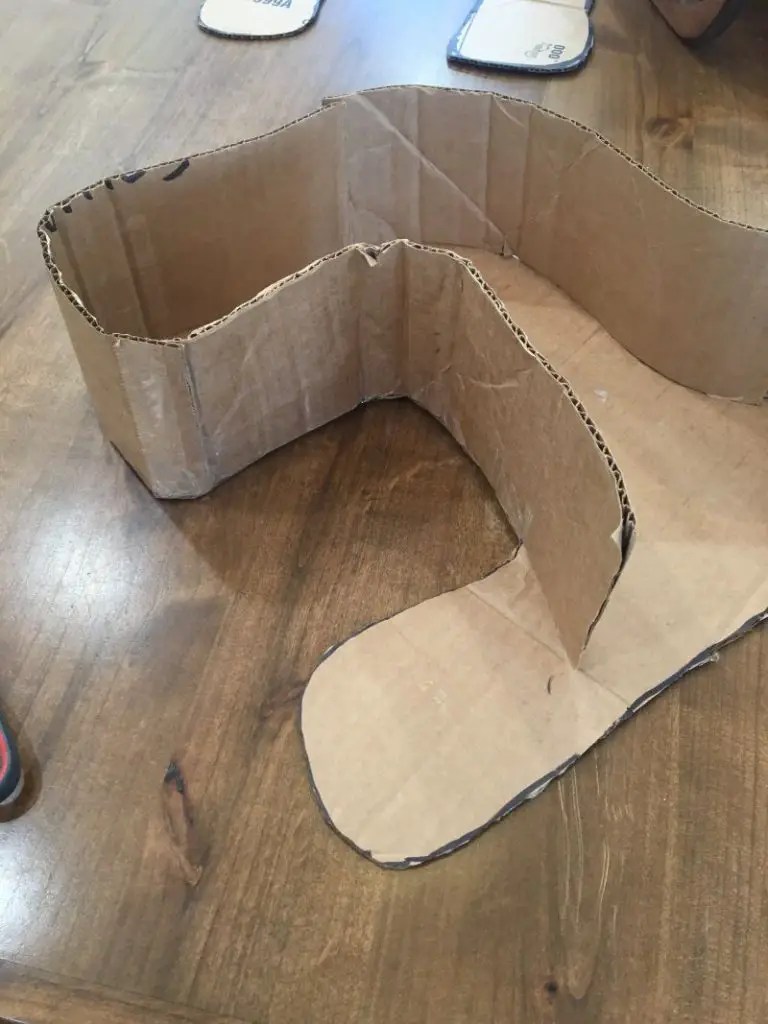
I found that bending the cardboard on the edge of the countertop helped me to curve it around the edges of the unicorn cutout. Continue to outline the entire body of the unicorn.
I used my pinata as a decoration, so I didn’t need to fill it with candy. However, if you want to fill it with candy, I recommend doing it now so you don’t have to try to patch it later.
Once you have outlined the entire unicorn and maybe even filled it with candy, tape the second unicorn cutout on top to close the unicorn’s body.
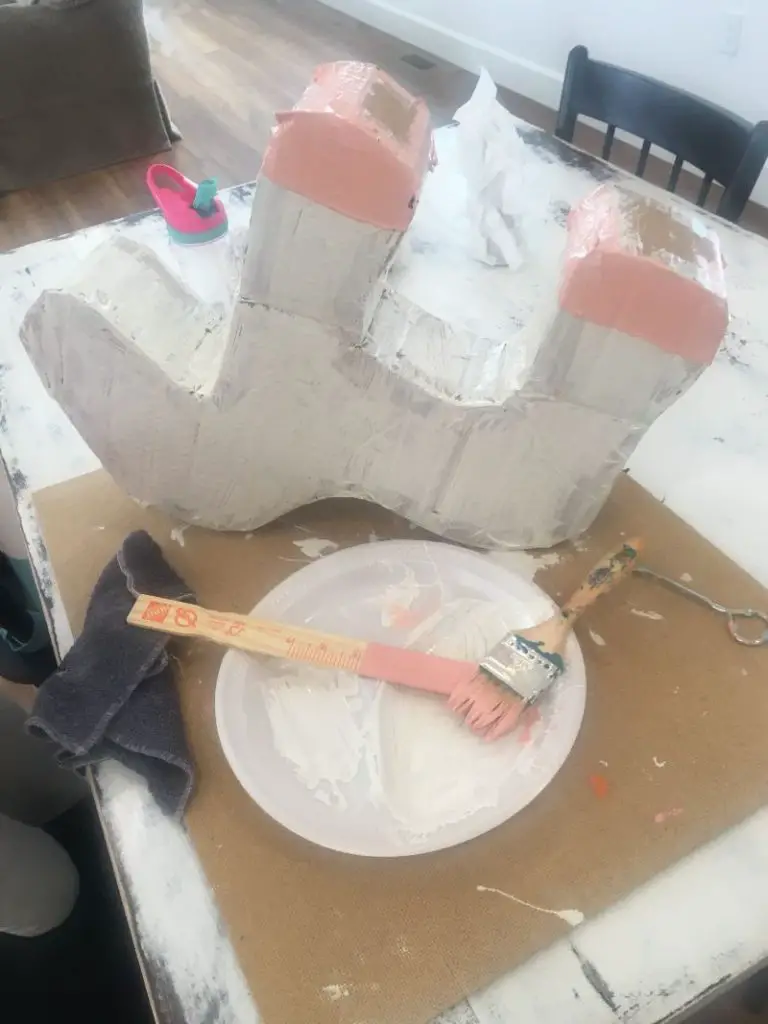
Step 4. Paint the Cardboard
Painting the cardboard will help make the tissue paper look better just in case you miss some spots.
I decided to do a white and pink unicorn because that is what color of tissue paper and paint I had!
Paint the unicorn’s body white, and paint it’s hooves pink. Let the paint dry. It doesn’t need perfect coverage, just enough to be a good base for the tissue.
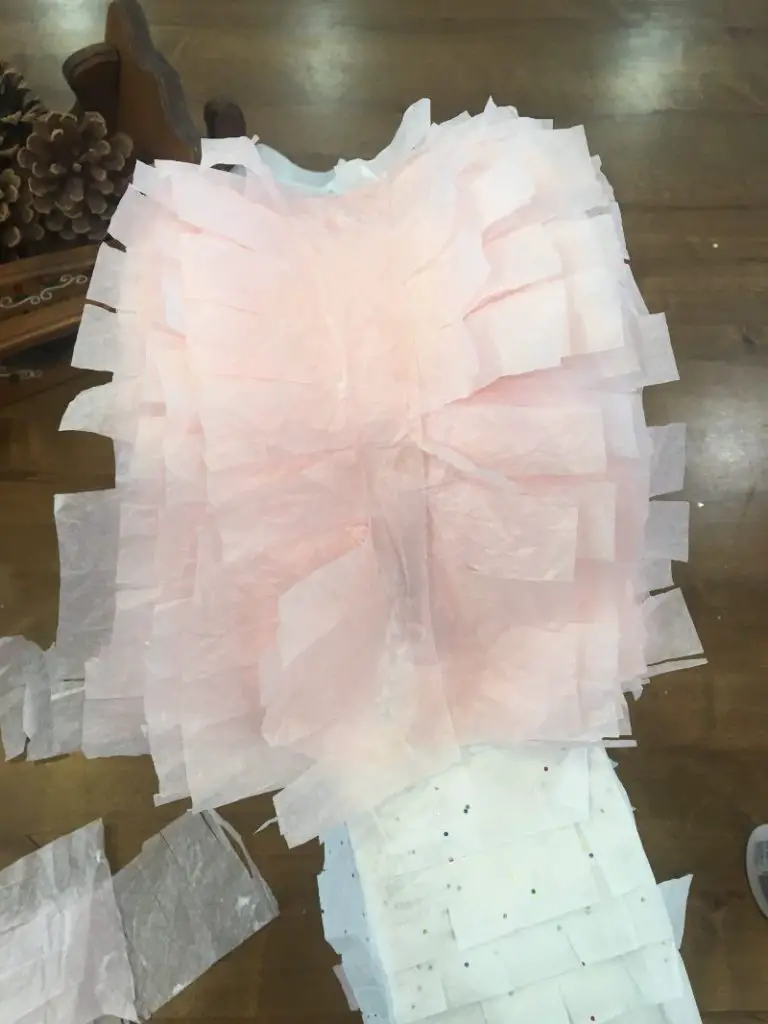
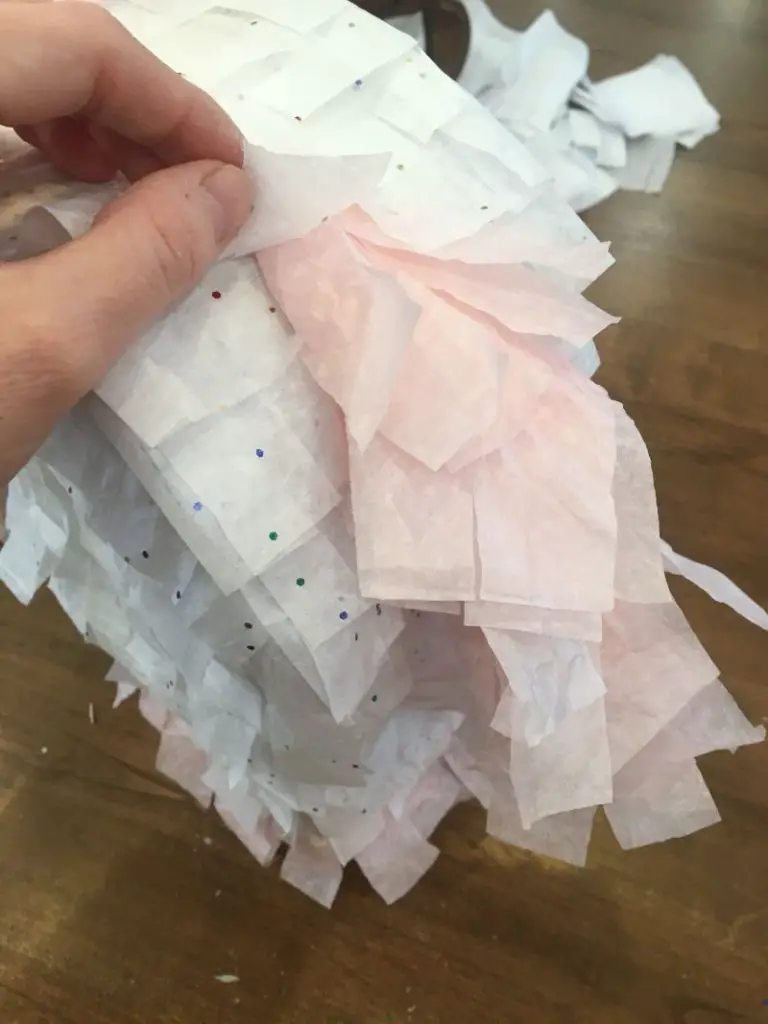
Step 5. Cut and attach the tissue paper.
To make the fringe on the tissue paper, cut out strips about 4×12 inches long. Then, cut lines about ¾ inch apart all the way down the strips. Don’t cut all the way through the strip, you want to leave about an inch on the side edge to be able to glue it on.
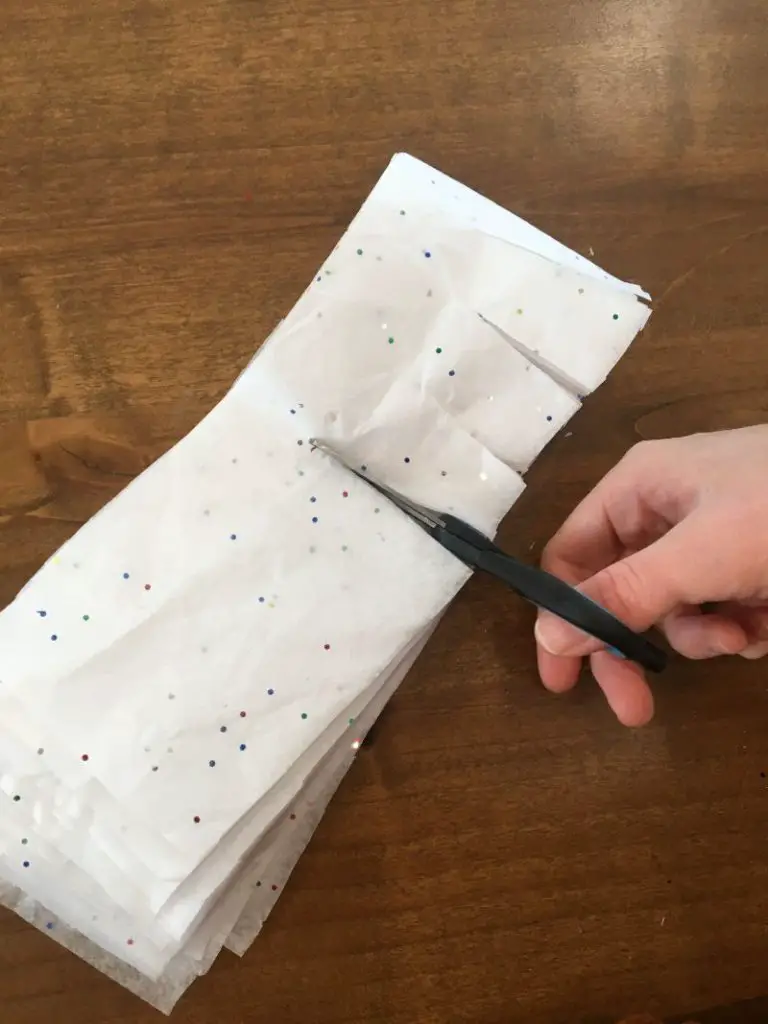
I cut a bunch of strips at a time by stacking them on top of each other.
To glue them to the unicorn, start at the bottom and work your way up. I started by gluing on pink tissue paper for the hooves. Work your way around each side of the hooves and legs to make sure its full and covered how you like it.
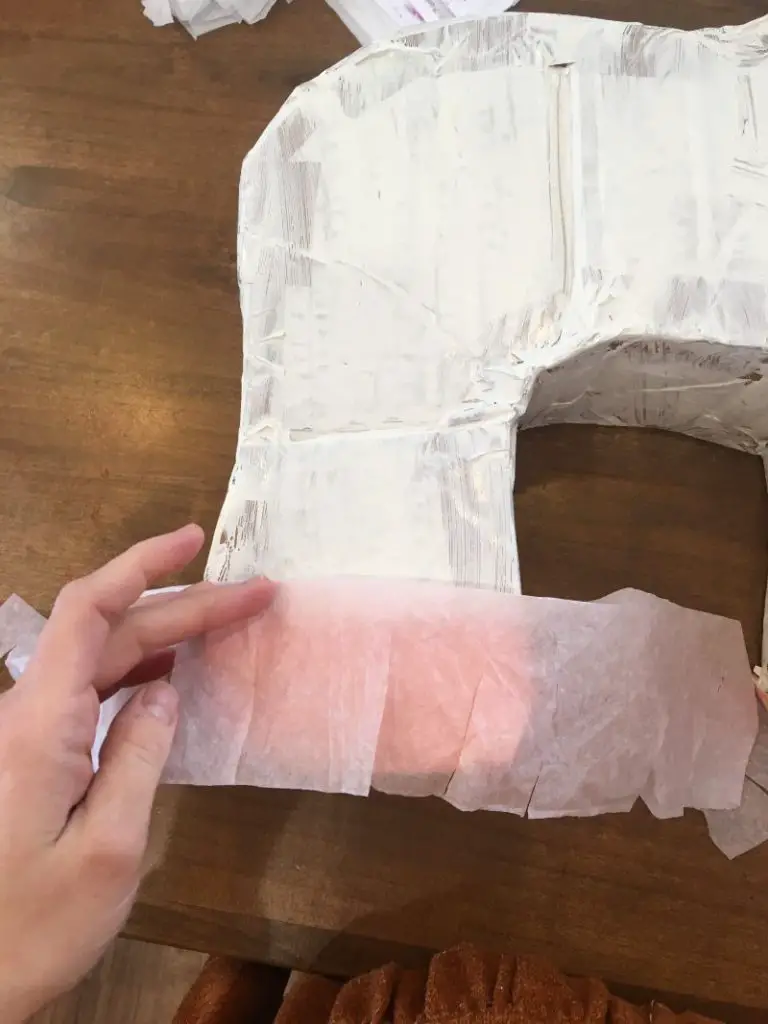
Then, start adding layers of white and work your way up the unicorn’s body.
Make sure to wrap it evenly and straight all around the back of the body and around the face.
Just keep adding more of the tissue paper fringe until it looks as fluffy as you want!
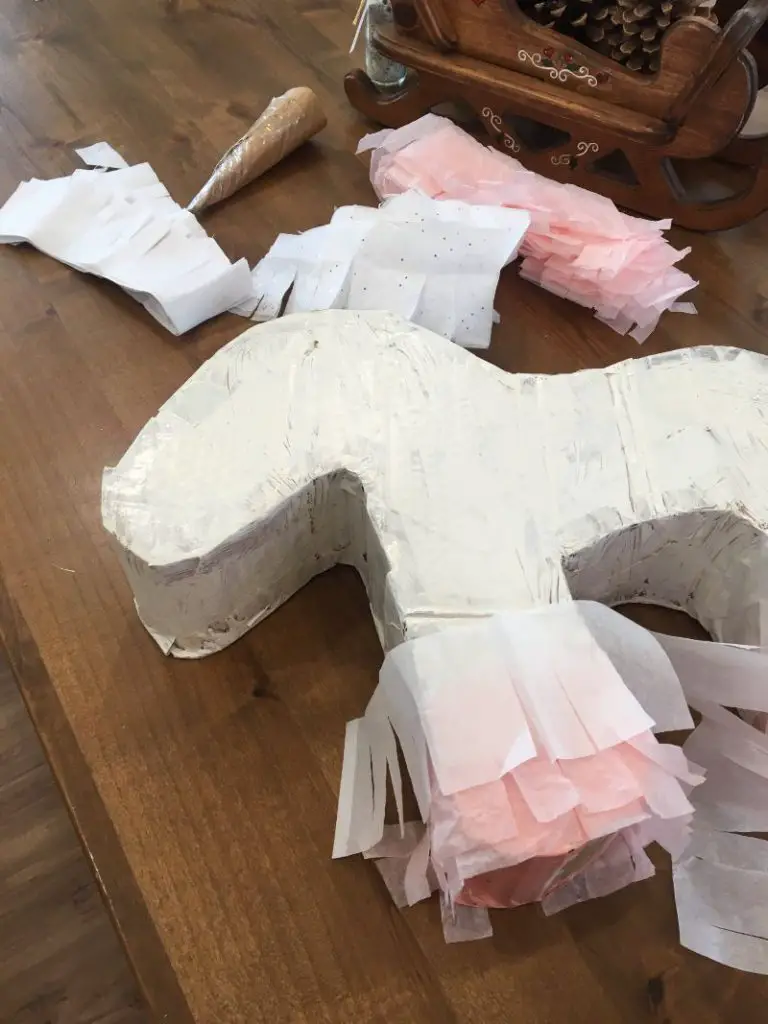
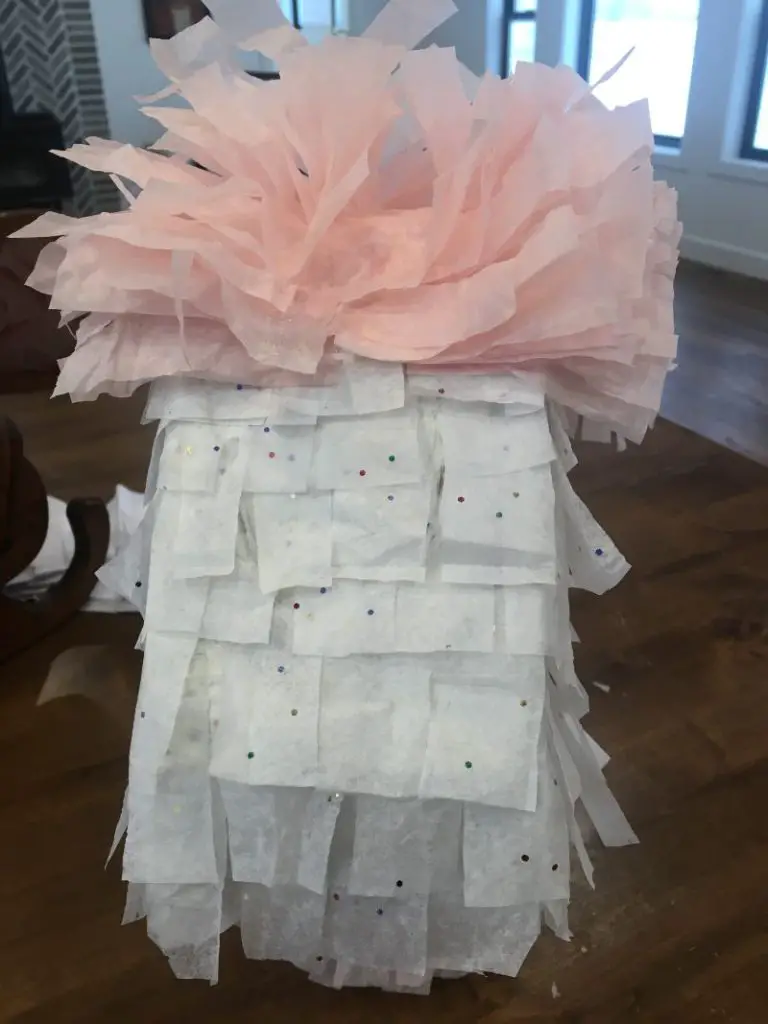
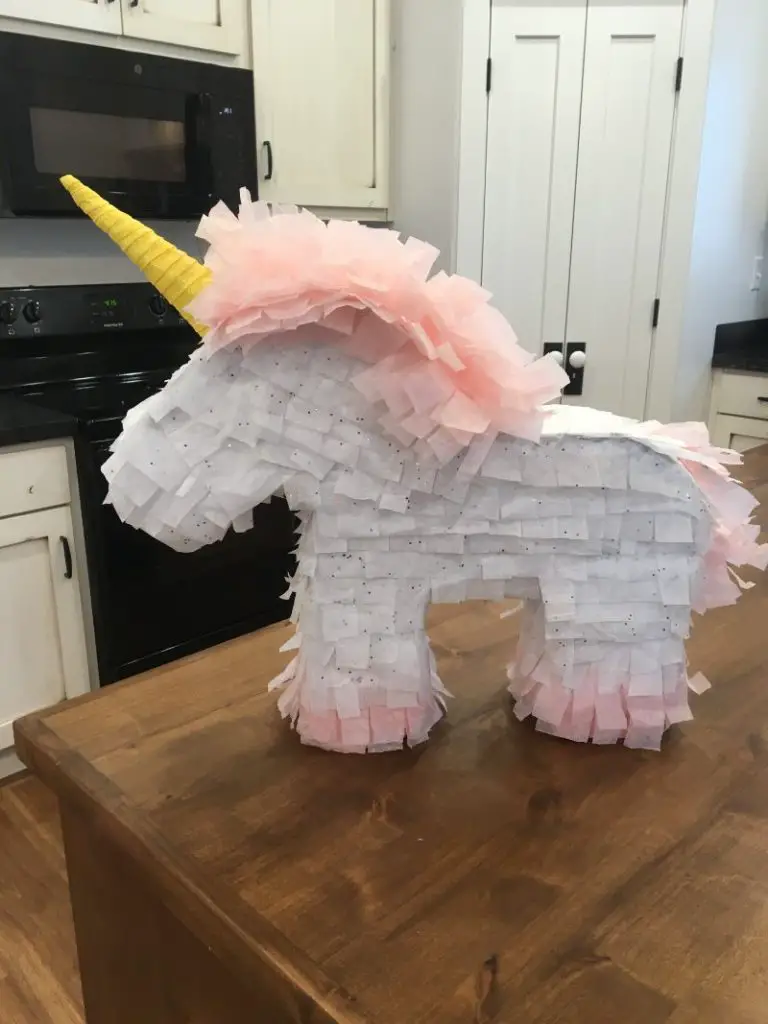
Step 6. Make the Unicorn hair
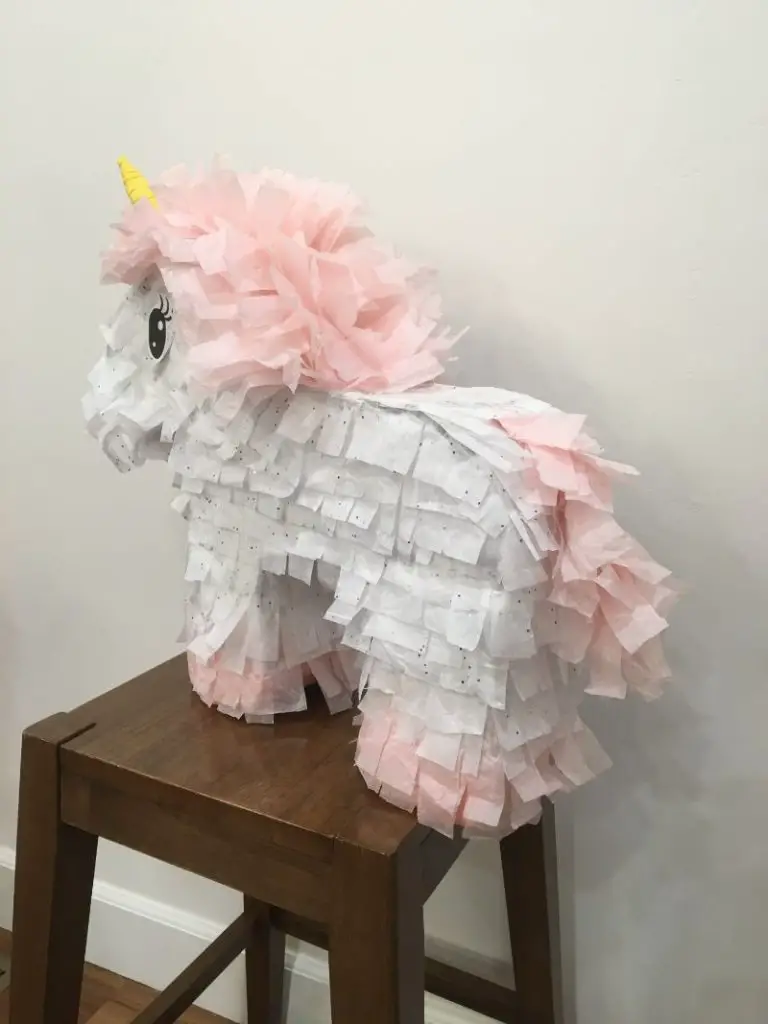
To make the hair, I made another pile of pink fringe out of the tissue paper. I then glued it onto the head facing to the right, and some facing to the left. Then I glued some in the middle and tried to fluff it pointing up as best I could to it didn’t look like it was smashed flat.
Here it the front view:
For the tail, I twisted a few strips of the fringed tissue paper into a cone like shape, then glued them on the bottom of the unicorn. I made sure to cover up the top tip of the tail with some of the white tissue paper to make it look like it was coming out from underneath the ‘fur’.
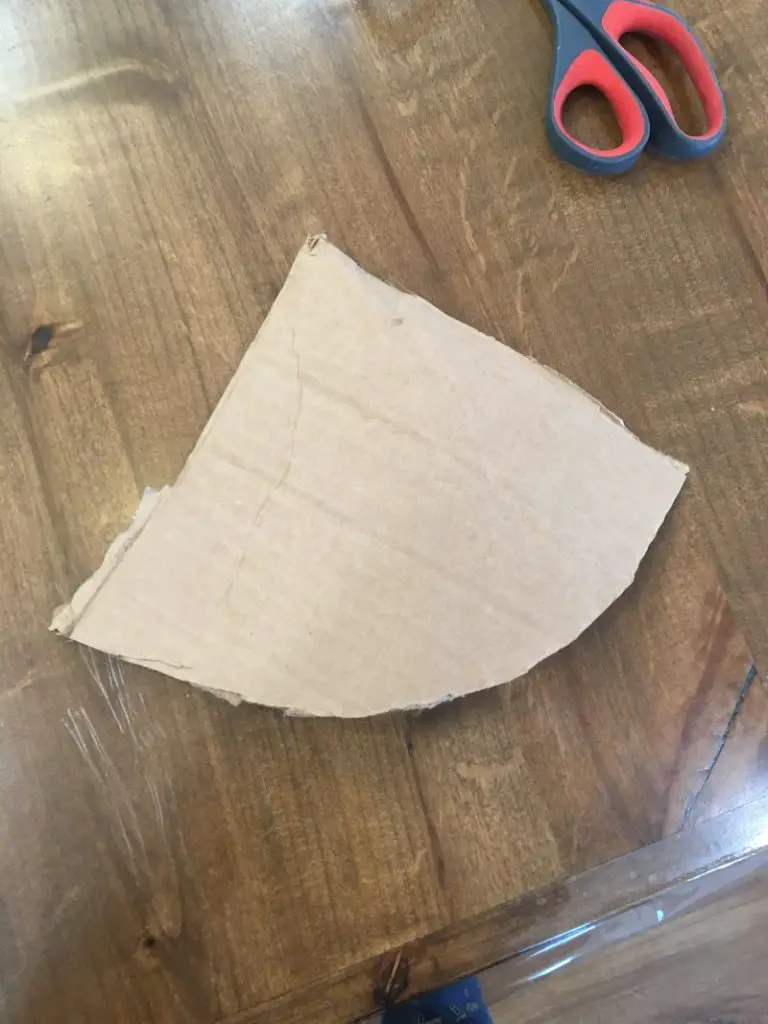
Step 7. Make the Unicorn’s Horn
To make the horn, I cut out a quarter circle shape of cardboard, then rolled it into a tight cone. Wrap it tight so it is flat on the bottom for the glue, not open like an icecream cone.
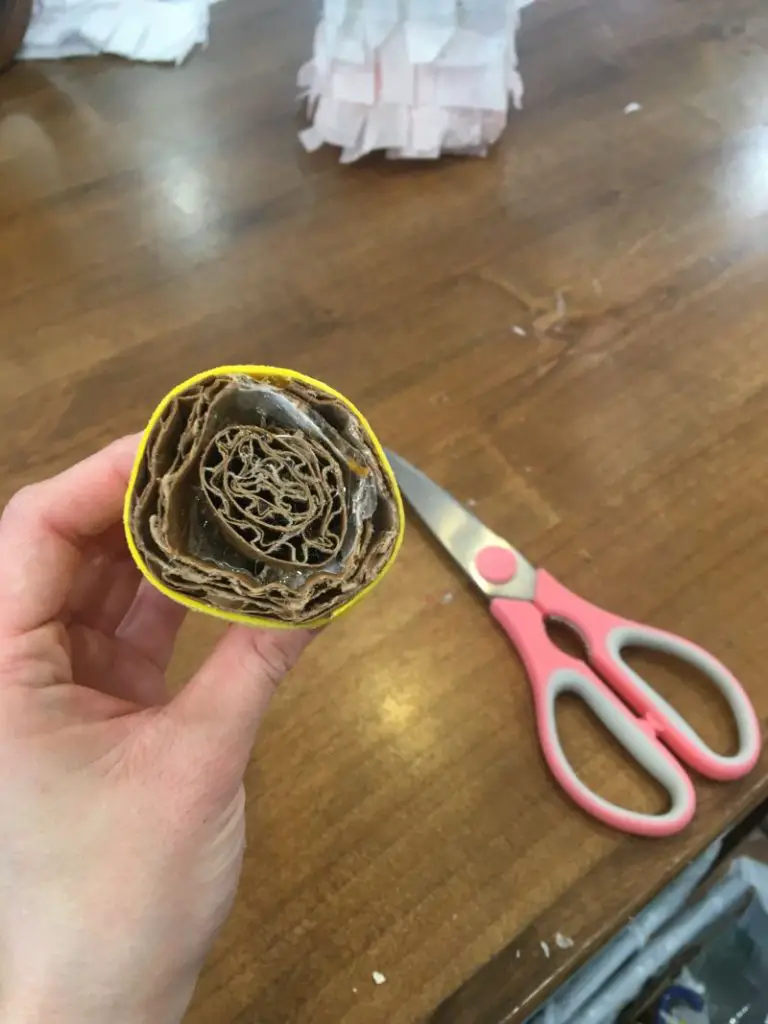
You can wrap it with whatever material you want, but I used some yellow sparkly foam I had leftover from a previous craft. Anything with sparkle will work!
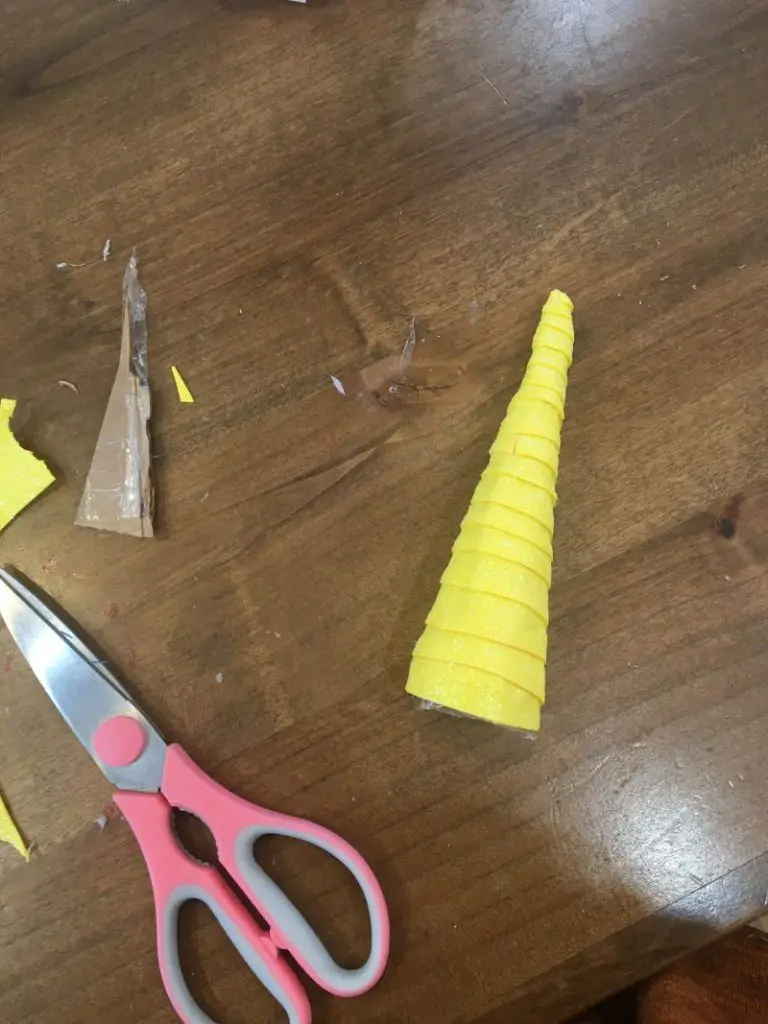
Use a lot of hot glue to glue the horn the the unicorn’s head.
Looking amazing so far!!
Step 8. Attach the eyes to the sides of the head
Cut out the two unicorn eyes and place them on the unicorn’s face to figure out where the look good. Glue them on.
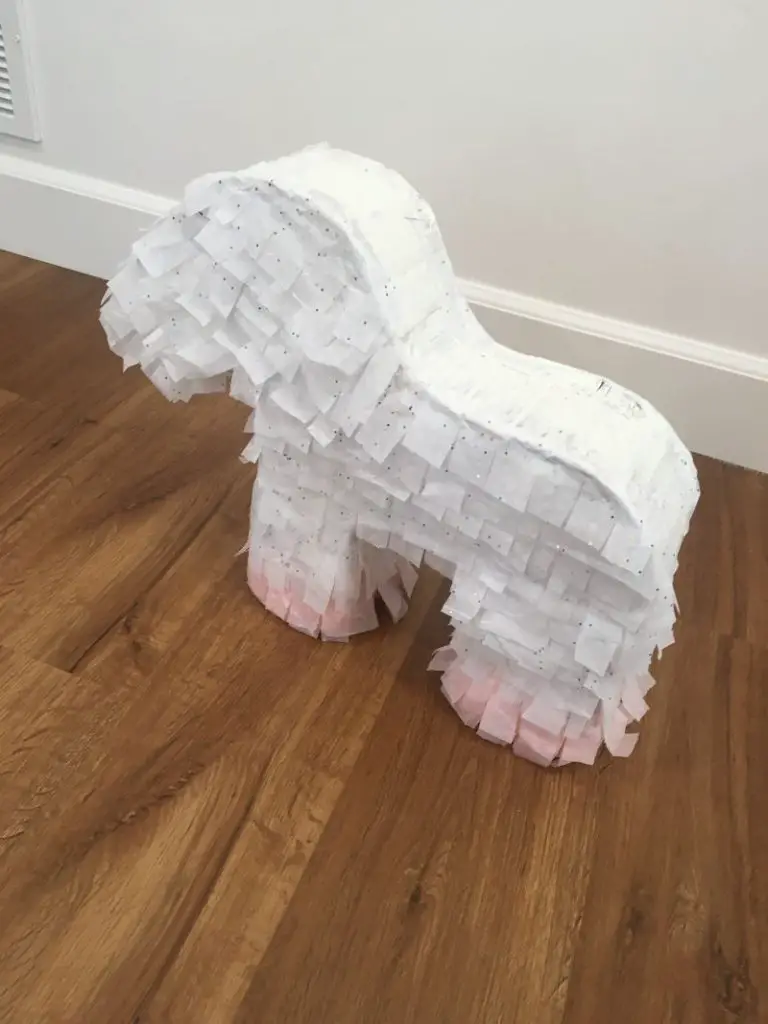
Step 9. Admire your unicorn
I am kidding, there is no step 9! That completes this awesome pinata! Take a step back and see how cute it is!
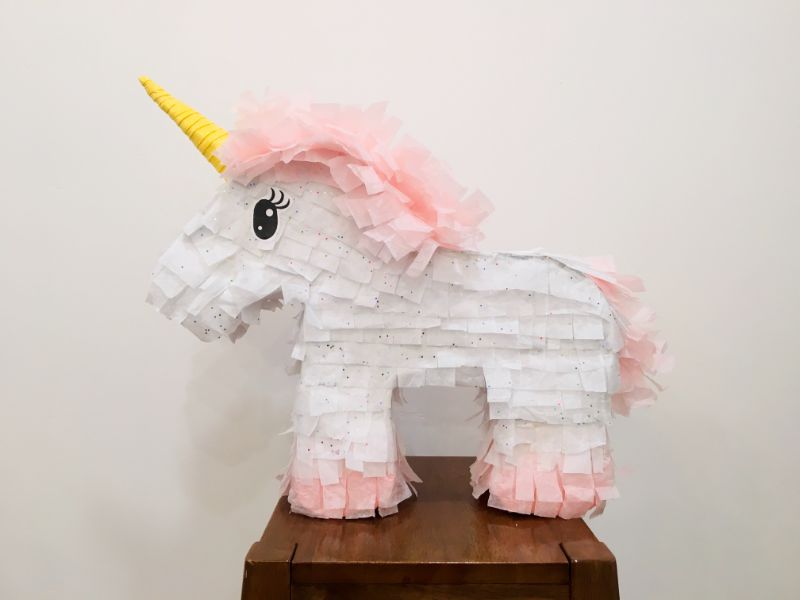
I am really pleased with how it turned out! For my very first pinata, I have to brag a little. It looks great!
**UPDATE**
My toddler LOVED her unicorn themed birthday, especially the pinata. She wants to use it again next year, but fill it with candy next time! I think I will cut a hole in the bottom and try to fill it and patch it for her.
Since we already got to use it as a display one time, I won’t feel so sad about using it as an actual pinata next time. I will hide it in a closet until next year!
I hope you liked this tutorial. If you need any help with any of these steps, let me know! I am happy to clarify anything for you.
Have fun and make sure to share this post!